Provisioning new environments with Bicep and Azure DevOps YAML Pipelines
Expert generalist • Independent Contractor • Microsoft MVP • Home Assistant enthusiast Hi there! I'm Bogdan Bujdea, a software developer from Romania. I'm currently a .NET independent contractor, and in my free time I get involved in the local .NET community or I'm co-organizing the @dotnetdays conference. I consider myself an expert generalist, mostly because I enjoy trying out new stuff whenever I get the chance and I get bored pretty easily, so on this blog you'll see me posting content from programming tutorials to playing with my smart gadgets.
In this article, we continue working on our sample application and I'm going to walk you through setting up a new QA environment, neatly tucked into its own resource group. The best part? We'll automate the entire process using Azure Pipelines and Bicep!
Before diving in, I highly recommend reading these two articles first:
Bicep Infrastructure Deployment from Azure DevOps YAML Pipelines
and
Azure DevOps Best Practices: Breaking Down the Monolithic YAML
After reading those articles, you will comprehend how to deploy an app using Azure DevOps pipelines and Bicep, as well as grasp the reasoning behind dividing my infrastructure code into multiple files.
If you have already done so or already have this knowledge, feel free to proceed with the rest of the article!
Provisioning a New Environment Using Bicep
There are various ways to separate environments, but my usual preference is to have one resource group for each environment, which is what I'll demonstrate in this guide.
The beauty of this approach is its ability to logically isolate environments. By separating resources into distinct resource groups according to their environment, management and monitoring become significantly more effortless.
If you remember, the primary configuration for our environment was stored in a prod.json file. This file contains crucial details, like the tier of the App Service, its SKU, and environment-specific prefixes (e.g., "prod"). Here is the file that we already have in our project:
{
    "$schema": "https://schema.management.azure.com/schemas/2019-04-01/deploymentParameters.json#",
    "contentVersion": "1.0.0.0",
    "parameters": {
      "location": {
        "value": "westeurope"
      },
      "appName": {
        "value": "bogdan-todo"
      },
      "appSku": {
        "value": "S1"
      }
    }
}
If we want another environment we should first add another file in the configurations folder, so let's continue with the first step!
Step 1: Create a New Configuration File
Start by adding a new file named qa.json in your configurations directory. This file will define settings tailored to the QA environment, setting it apart from production or any other environments you might have.
{
    "$schema": "https://schema.management.azure.com/schemas/2019-04-01/deploymentParameters.json#",
    "contentVersion": "1.0.0.0",
    "parameters": {
      "location": {
        "value": "westeurope"
      },
      "appName": {
        "value": "bogdan-todo-qa"
      },
      "appSku": {
        "value": "S1"
      }
    }
  }
Step 2: Adjust Environment-Specific Variables
Inside qa.json, alter variables to reflect the QA environment's attributes. This could involve tweaking parameters like the App Service tier, resource names, or any environment-specific metadata. In my file, I made just one change, the appName parameter was set to bogdan-todo-qa
I did this because we can't have two identical subdomains under the same domain (azurewebsites.net). Since I already have bogdan-todo-app.azurewebsites.net I need to change the appName to something else, in our case, it will be bogdan-todo-qa-app.azurewebsites.net
Step 3: Create the pipeline stage for this environment
I think it's a good idea to break your pipeline into multiple components, so that's why I have each environment with its own stage. For the production stage we already have the file production.yaml, so let's create one for QA as well.
stages:
- stage: QA
  displayName: 'Deploy To QA Env'
  dependsOn: Test
  variables:
    location: 'westeurope'
    configFileName: 'qa.json'
    resourceGroupName: 'azure-devops-yaml-pipeline-qa'
  jobs:
    - job: UpdateAzureResources
      steps:
        - task: AzureCLI@2
          displayName: 'Deploy Bicep Infrastructure'
          inputs:
            azureSubscription: 'AzureConnection'
            scriptType: 'pscore'
            scriptLocation: 'scriptPath'
            scriptPath: './infrastructure/deploy.ps1'
            arguments: '$(resourceGroupName) $(location) $(configFileName)'
    - job: Deploy
      dependsOn: UpdateAzureResources
      steps:
        - task: DownloadPipelineArtifact@2
          displayName: 'Download pipeline artifact'
          inputs:
            buildType: 'current'
            artifactName: 'drop'
            targetPath: '$(Pipeline.Workspace)/drop'
        - task: AzureWebApp@1
          displayName: 'Deploy to QA app service'
          inputs:
            azureSubscription: 'AzureConnection'
            appType: 'webAppLinux'
            appName: 'bogdan-todo-qa-app'
            package: '$(Pipeline.Workspace)/drop'
            resourceGroupName: $(resourceGroupName)
            runtimeStack: 'DOTNETCORE|7.0'
            startUpCommand: 'dotnet ToDoApp.Server.dll'
I copy-pasted my production.yaml to qa.yaml, but I still had to make some changes:
the name of the stage was changed to
QA, also thedisplayNamewas updatedWe need a new resource group for this environment, so I changed the name of the
resourceGroupNamevariable to'azure-devops-yaml-pipeline-qa'
We also have to update our production.yaml so that it will not depend on the Test stage anymore. We need to prevent our production deployment if the QA deployment fails.
stages:
- stage: Production
  displayName: 'Deploy To Production Env'
  dependsOn: QA # this was changed from Test to QA
....
Step 4: Include the new stage in your main pipeline file
I will now add the qa.yaml reference to azure-pipelines.yaml:
trigger:
- main

pool:
  vmImage: 'ubuntu-latest'

variables:
  solution: '**/*.sln'
  buildPlatform: 'Any CPU'
  buildConfiguration: 'Release'


stages:
- template: stages/build.yaml
- template: stages/test.yaml
- template: stages/qa.yaml
- template: stages/production.yaml
Step 5: Deploy and Watch Bicep Work Its Magic
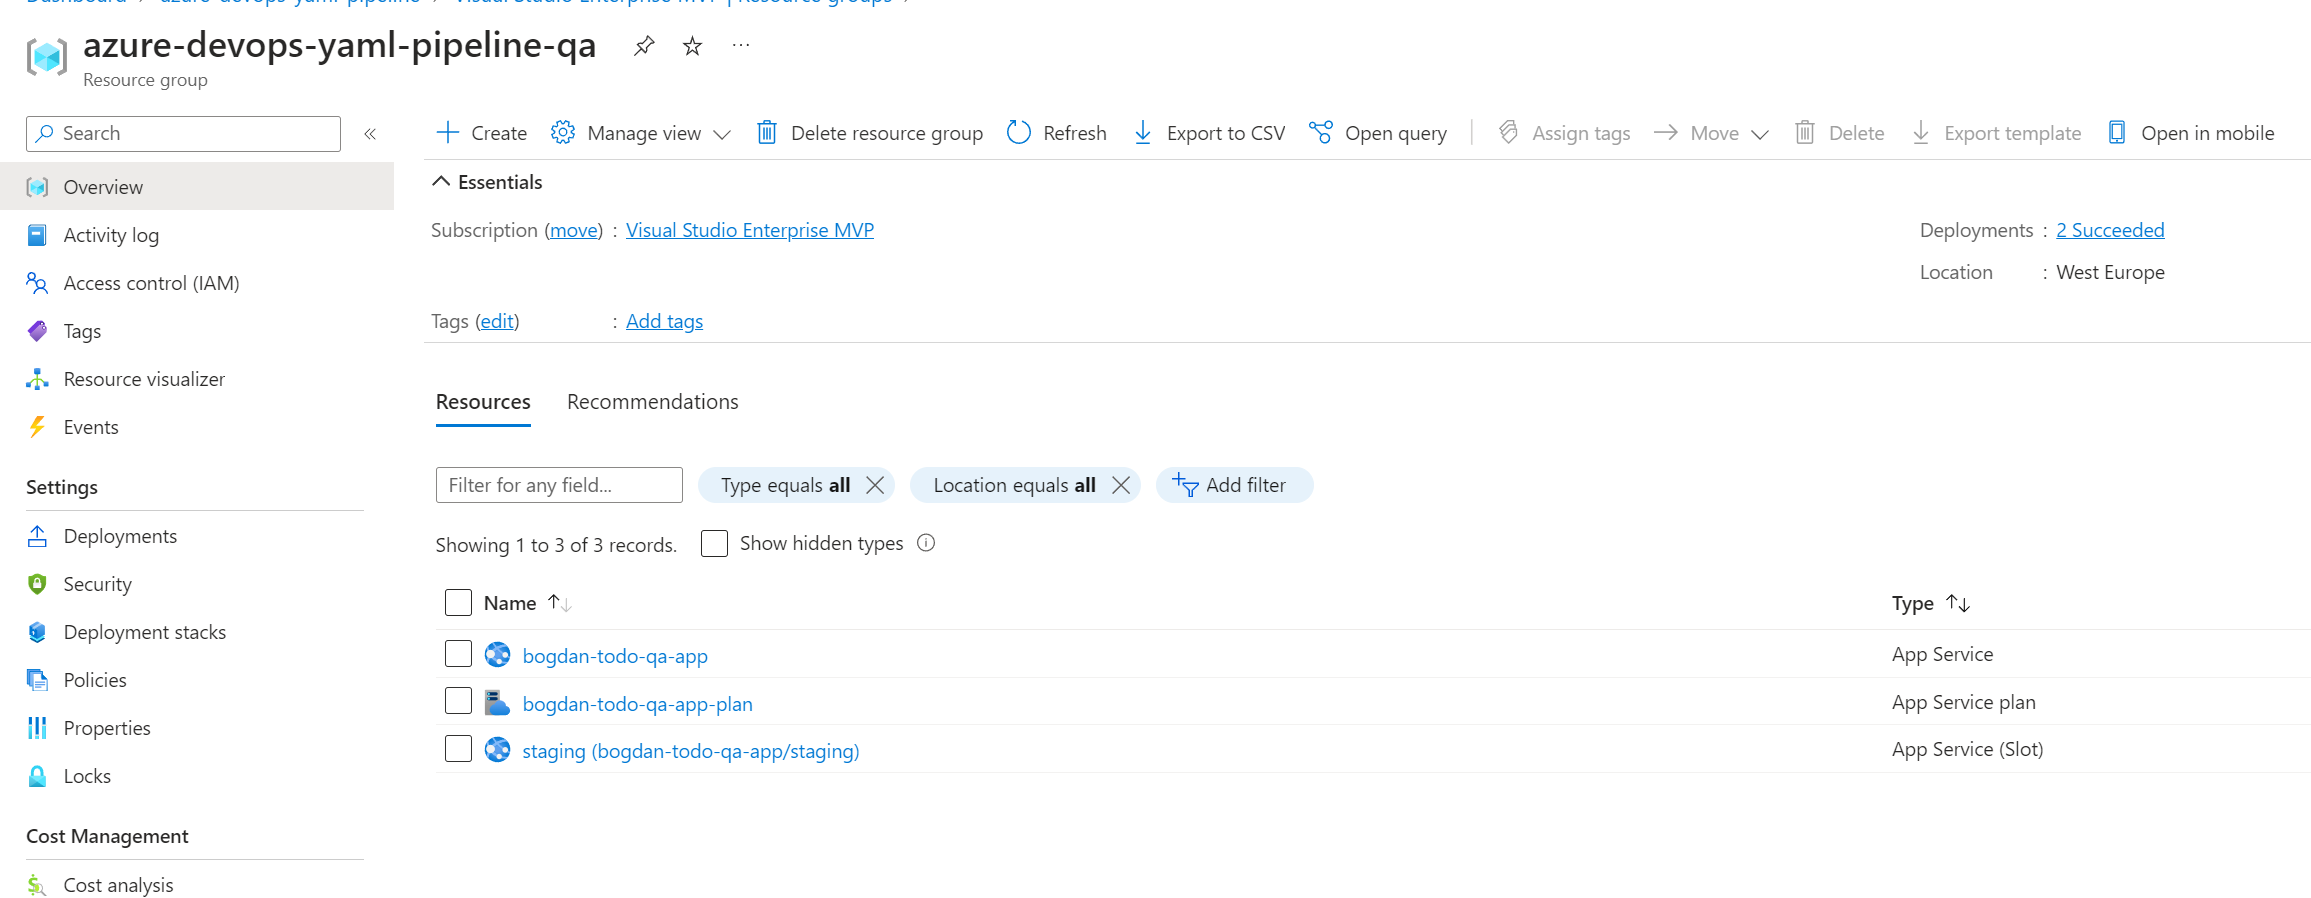
Initiate the deployment process, just as you did previously. As Bicep processes the qa.json configuration, it will provision a brand-new resource group labeled for the QA environment.
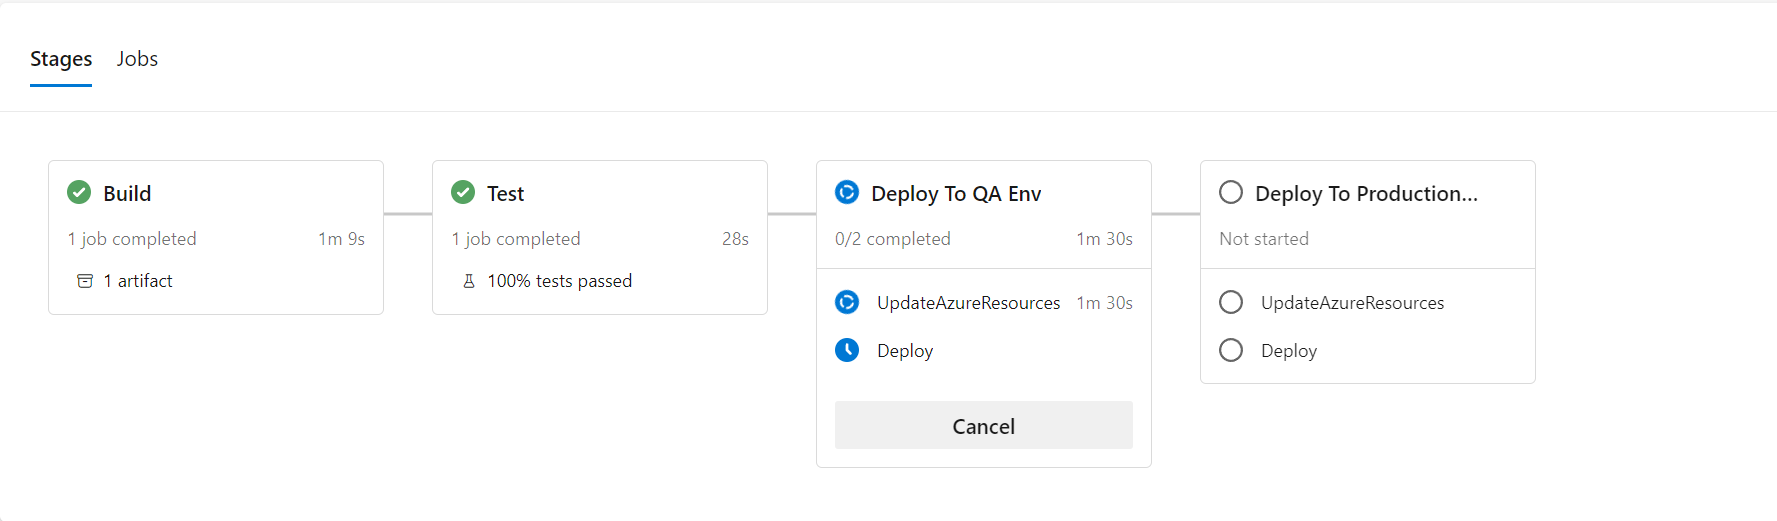
Once the QA stage is complete the new environment will be up and running in Azure!
Wrapping Up
With a few simple configurations and Bicep's robust capabilities, you can dynamically create multiple environments tailored to specific needs. The era of tedious, manual provisioning is behind us!
What's next
In the next article, I will remove the staging slot from the QA environment to demonstrate how to add conditions in Bicep files. Feel free to subscribe to the newsletter below or follow me on Twitter if you'd like to be notified as soon as possible!