Bicep Infrastructure Deployment from Azure DevOps YAML Pipelines
Expert generalist • Independent Contractor • Microsoft MVP • Home Assistant enthusiast Hi there! I'm Bogdan Bujdea, a software developer from Romania. I'm currently a .NET independent contractor, and in my free time I get involved in the local .NET community or I'm co-organizing the @dotnetdays conference. I consider myself an expert generalist, mostly because I enjoy trying out new stuff whenever I get the chance and I get bored pretty easily, so on this blog you'll see me posting content from programming tutorials to playing with my smart gadgets.
In this article, I will show you how to deploy your infrastructure using Bicep files from an Azure DevOps YAML pipeline. Instead of merely discussing theory, we will create a Blazor app and deploy it to Azure using Bicep. Before diving in, let's briefly discuss the advantages of adopting this approach.
Why deploy infrastructure using Bicep?
I won't cover all the advantages of this approach, but I'll highlight the two most important ones for me. First, you can treat your infrastructure as code and store it in a repository, allowing you to approve changes and track its progress over time. Second, automation becomes possible, as you can easily deploy Bicep files instead of manually creating and configuring resources in Azure. For instance, if you need another environment for your project, you can quickly create it with minor adjustments to your Bicep code. We'll discuss all of this in detail throughout the article.
Preparing Azure DevOps for Bicep deployment
Before our pipeline can make Azure deployments we first need to create a service connection to Azure. For this, go to project settings and then click on "Service connections":
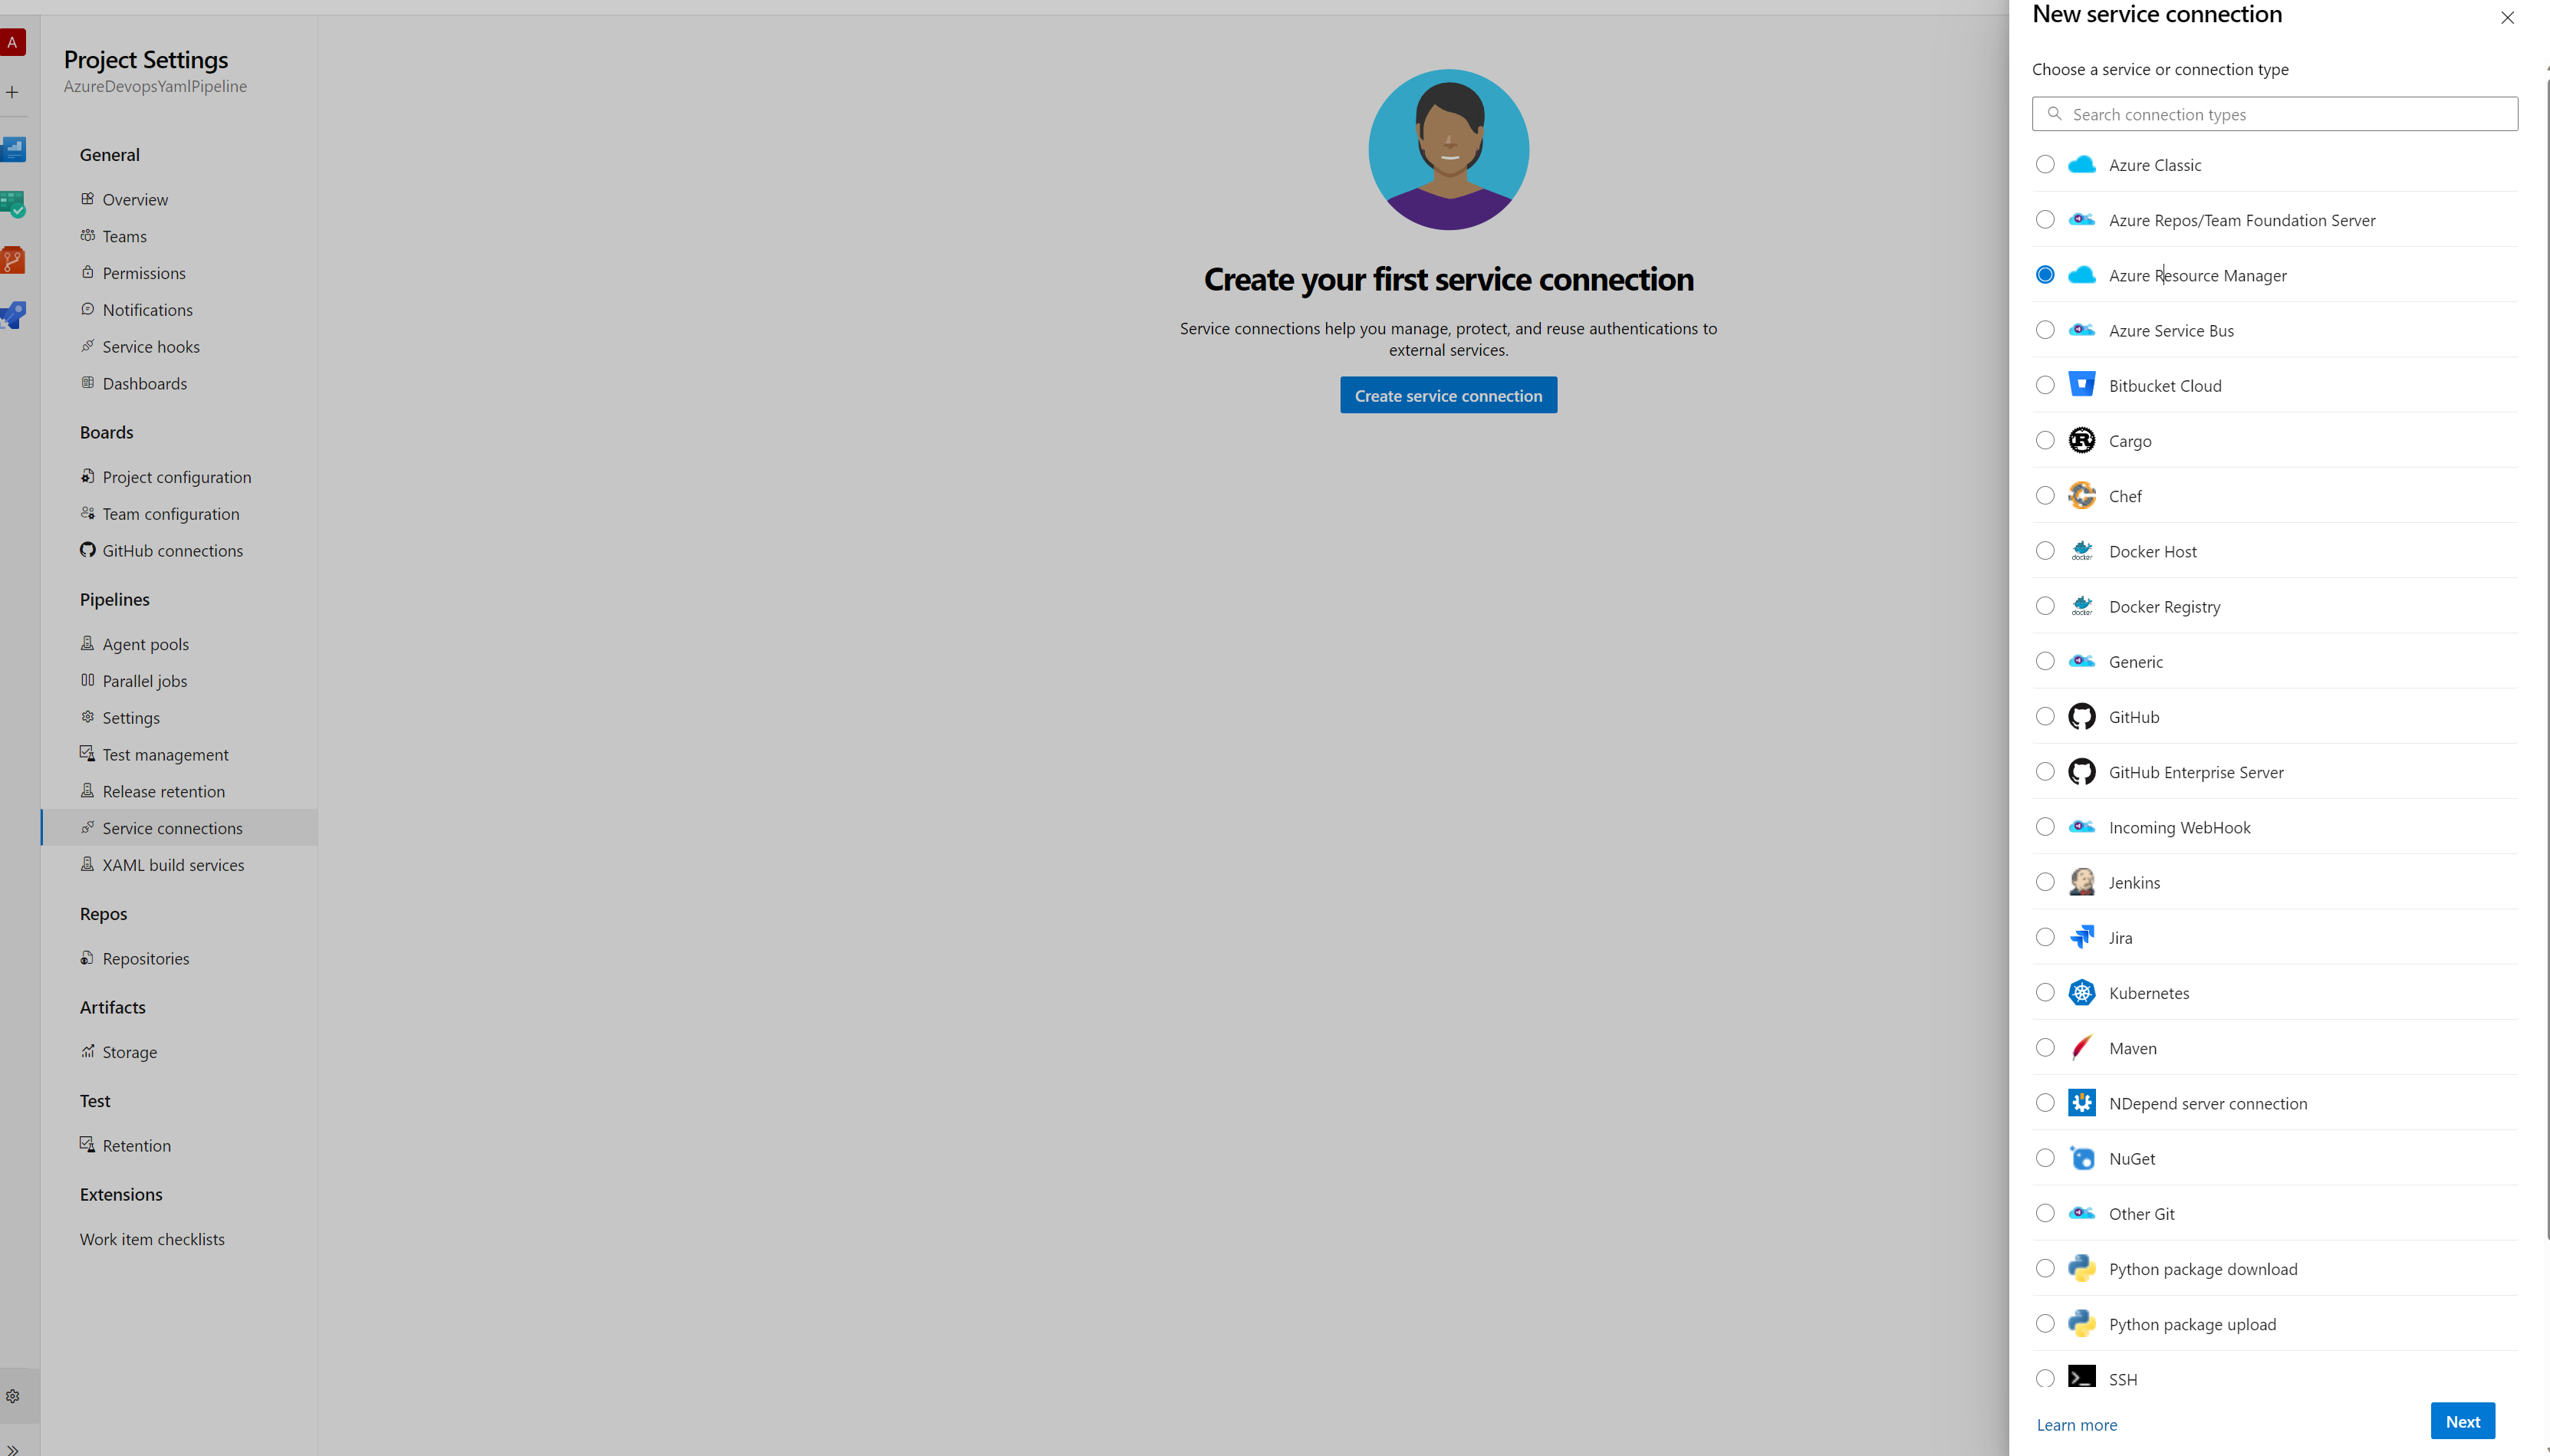
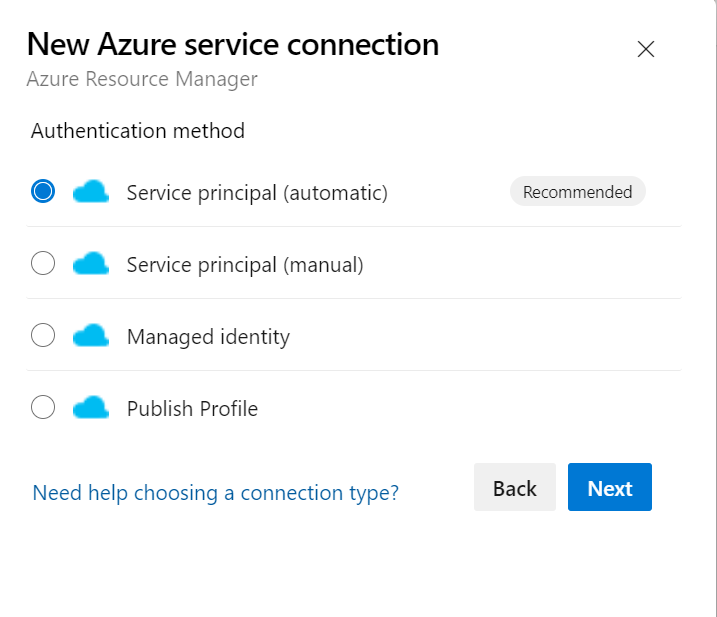
Now, choose the option labeled "Azure Resource Manager" and click on "Service principal (automatic)." Proceed by clicking "Next," and upon completing the wizard, your service connection will be established.
Writing the Bicep code
Our next step is to write the Bicep code which will create our app service and app service plan.
I won't turn this blog post into a Bicep tutorial, but I will write another post to provide some tips for getting started. For now, I'll assume that you know how to write Bicep or at least understand some basic YAML, as we're not dealing with complicated tasks.
When we're working with Infrastructure as Code (IaC), especially with more complex setups, it's crucial to maintain clarity and organization. Bicep lends itself brilliantly to modular designs so it's easy to understand why our Bicep code will be separated into two files: main.bicep and app.bicep
main.bicep can be seen as the entry point or the orchestrator of our infrastructure deployment. It's where we define which modules or sets of resources should be deployed. By referencing other Bicep files (like app.bicep), the main file allows us to break apart our infrastructure into manageable chunks or modules, giving us the freedom to combine, reuse, or extend them as needed.
param location string = resourceGroup().location
param appName string
param appSku string

module app 'app.bicep'  = {
  name: 'bogdan-todo-app'
  params:{
    location: location
    appName : appName
    appSku: appSku
  }
}
The app.bicep file is dedicated to defining the resources specifically needed for the Blazor app component of our application. By keeping the definition of our app infrastructure separate in app.bicep, we achieve a few things:
Clarity: It's immediately clear what resources this file defines without mixing it up with other unrelated resources.
Reusability: If we were to deploy another similar app or service in the future, having a dedicated file makes it much easier to replicate or make slight modifications without reinventing the wheel.
Scalability: As our app's infrastructure grows in complexity, having a dedicated file allows us to manage that complexity without cluttering our main deployment script.
This is the code for our app, it's pretty simple but in future articles we're going to expand it by adding app settings, connection strings, slots, managed identities, etc.
param location string = resourceGroup().location
param appName string
param appSku string = 'S1'

resource asp 'Microsoft.Web/serverfarms@2022-03-01' = {
  name: '${appName}-app-plan'
  location: location
  sku: {
    name: appSku
  }
  kind: 'linux'
  properties:{
    reserved: true
  }
}

resource webApp 'Microsoft.Web/sites@2022-03-01' = {
  name: '${appName}-app'
  location: location
  identity: {
    type: 'SystemAssigned'
  }
  kind: 'app,linux'
  properties: {
    serverFarmId: asp.id
    httpsOnly: true
    siteConfig: {
      httpLoggingEnabled: true
      linuxFxVersion: 'DOTNETCORE|6.0'
    }
  }
}
As you can see, the app.bicep file has 3 parameters: location, name and SKU. I'm using the same location as the resource group for simplicity, and the appName and appSku come from the main module, which in turn receives them from a configuration file.
The configuration (called prod.json) file looks like this:
{
    "$schema": "https://schema.management.azure.com/schemas/2019-04-01/deploymentParameters.json#",
    "contentVersion": "1.0.0.0",
    "parameters": {
      "location": {
        "value": "westeurope"
      },
      "appName": {
        "value": "bogdan-todo"
      },
      "appSku": {
        "value": "S1"
      }
    }
  }
If I decide to create another environment in the future I just need to create another json file. For example, let's say I want to create a "dev" environment, so I'll create a dev.json file where I can simply change the appName to something like bogdan-todo-dev and choose a lower appSku if I want to reduce costs for that environment. As you can see, creating new environments becomes quite easy once this is set up.
Running the Bicep deployment from a YAML pipeline
To deploy these Bicep files I'm going to write a Powershell script which will get executed in the pipeline. The script looks like this:
[CmdletBinding()]
param (
    $resourceGroupName,
    $location,
    $configFileName
)

az group create --name $resourceGroupName --location $location
az deployment group create --resource-group $resourceGroupName --template-file ./infrastructure/main.bicep --parameters ./infrastructure/environments/$configFileName
Now let's show the pipeline code as well:
trigger:
- main

pool:
  vmImage: 'ubuntu-latest'

variables:
  solution: '**/*.sln'
  buildPlatform: 'Any CPU'
  buildConfiguration: 'Release'
  location: 'westeurope'
  configFileName: 'prod.json'
  resourceGroupName: 'azure-devops-yaml-pipeline'

# build and test stage skipped for now

- stage: update_infrastructure
  displayName: 'Deploy Bicep Infrastructure'
  jobs:
    - job: UpdateAzureResources
      steps:
        - task: AzureCLI@2
          displayName: 'Deploy Bicep Infrastructure'
          inputs:
            azureSubscription: 'AzureConnection'
            scriptType: 'pscore'
            scriptLocation: 'scriptPath'
            scriptPath: './infrastructure/deploy.ps1'
            arguments: '$(resourceGroupName) $(location) $(configFileName)'

# app service deployment at the end
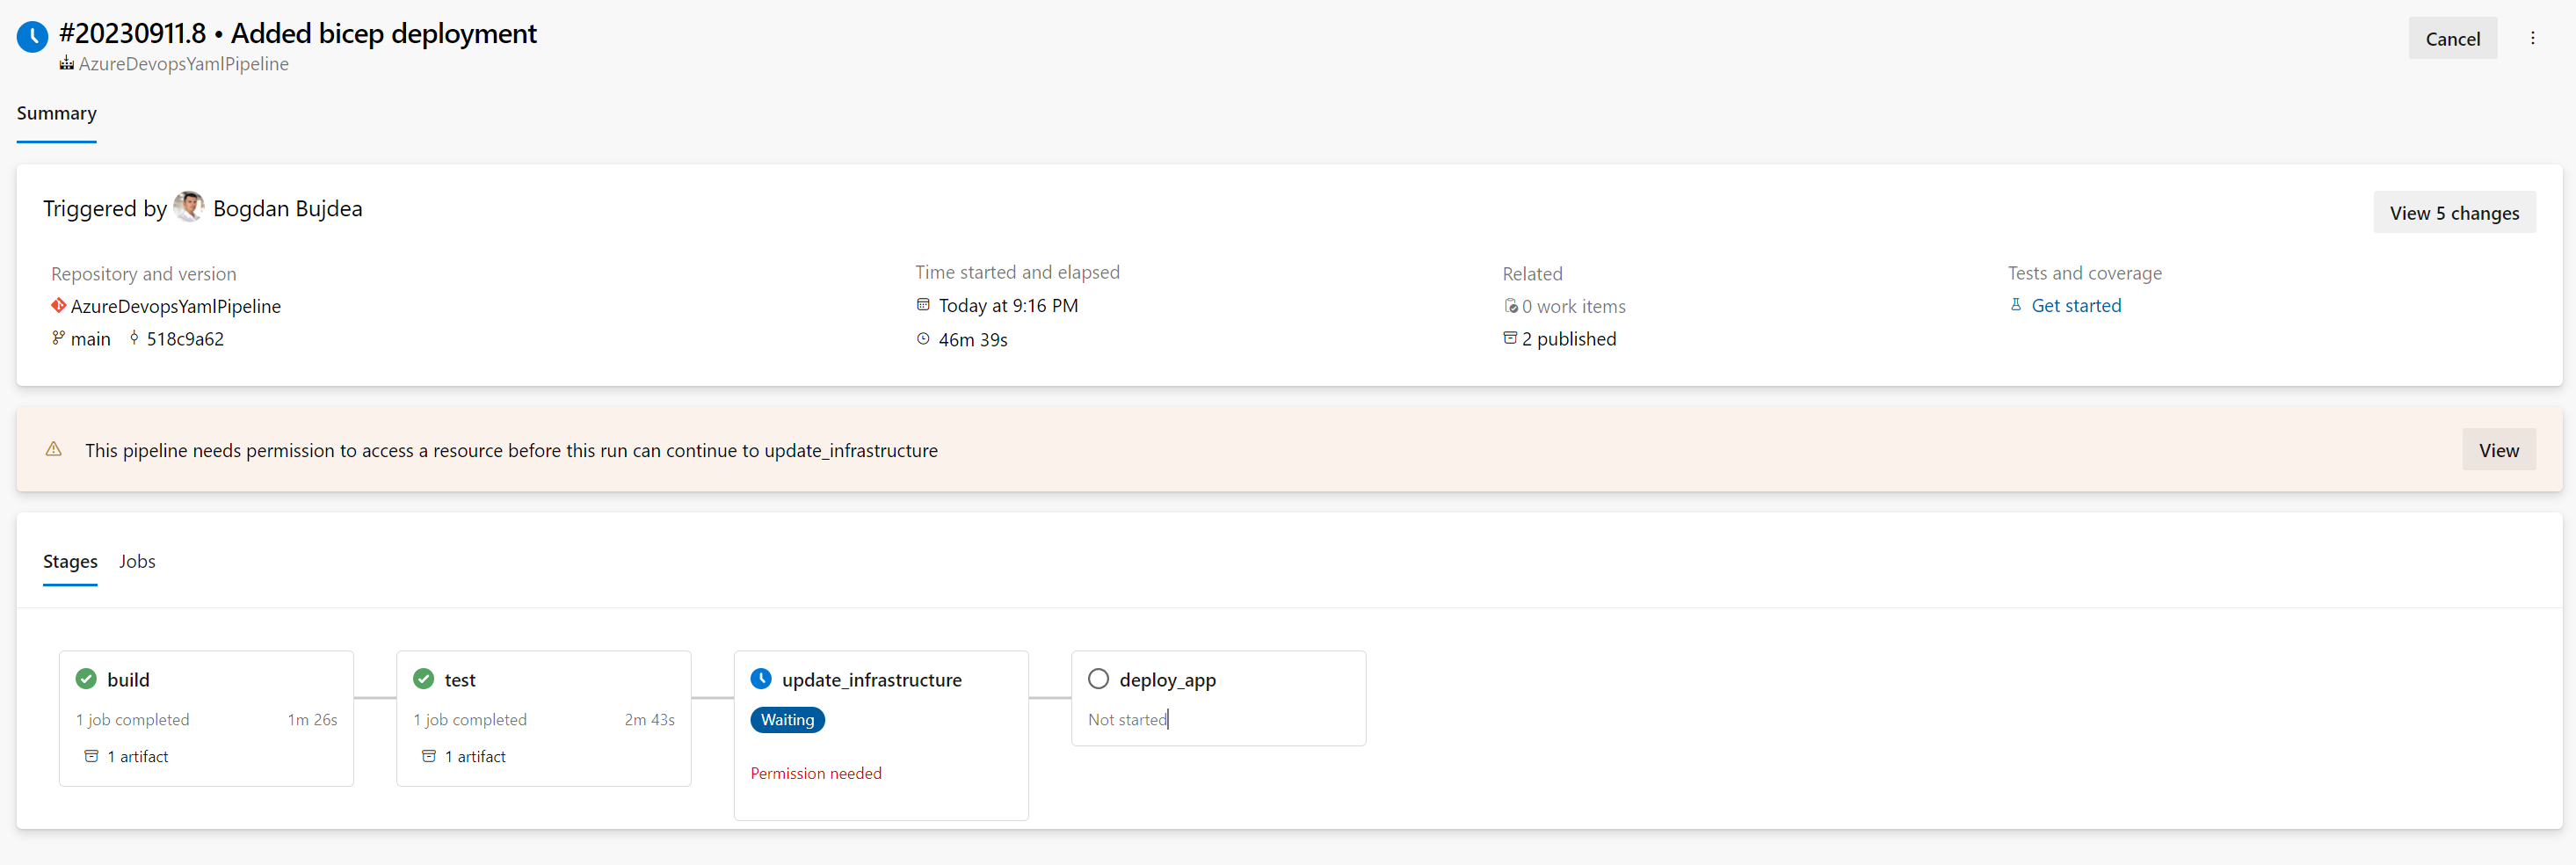
This stage updates the infrastructure every time it is executed. Since our script requires permission to interact with Azure, we must provide the name of our service connection in the azureSubscription parameter. Next, we specify the script's path and supply it with some arguments. With everything set up, let's push our code to Azure and observe how it functions.
One other step we have to do is to allow our service connection to be used by this pipeline, so click on View:
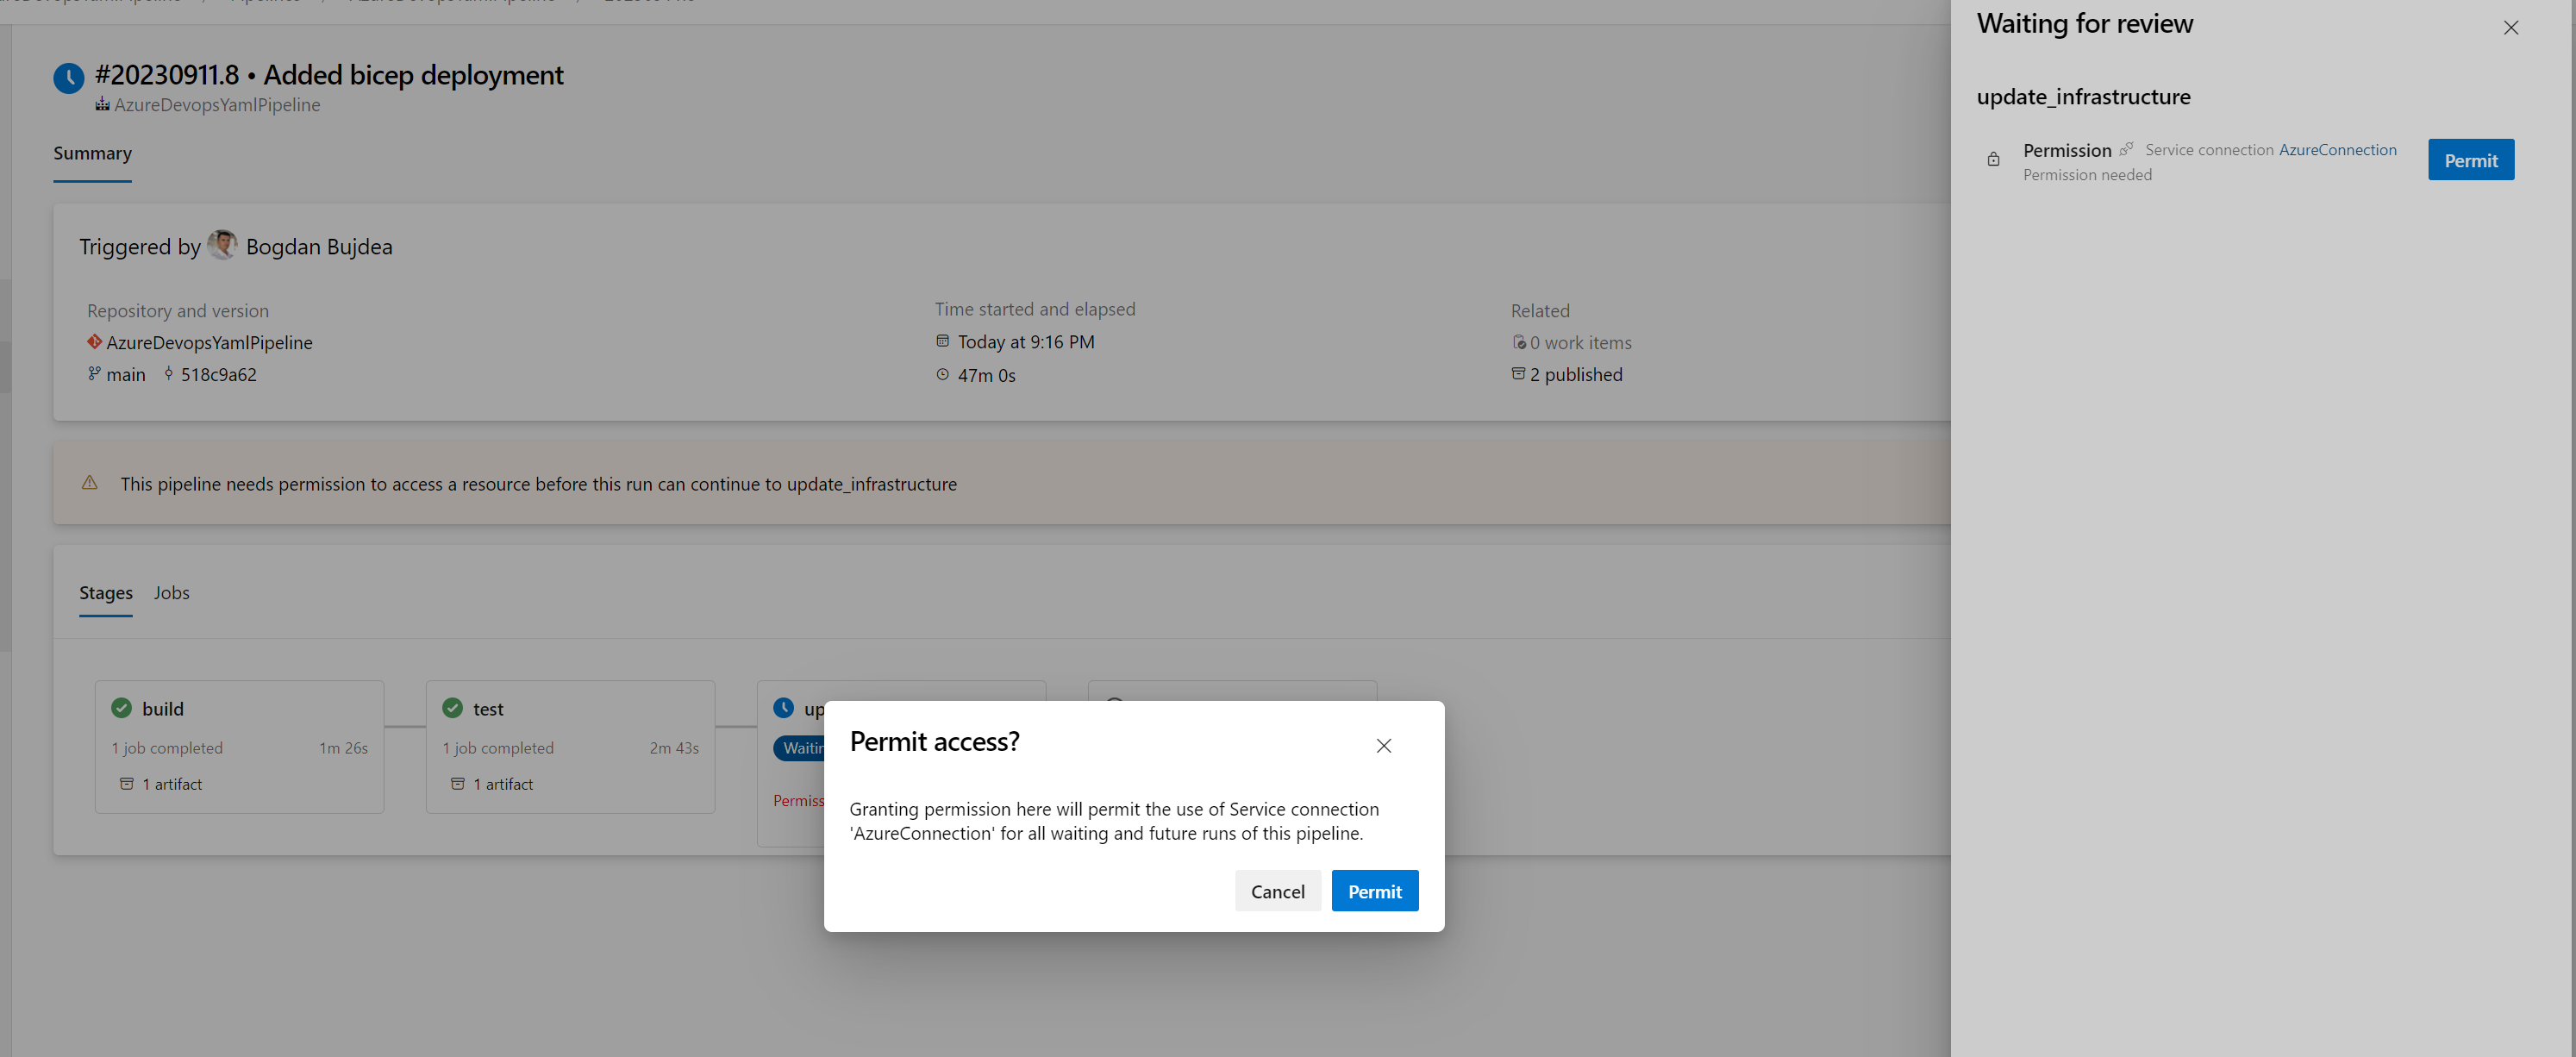
And then click on Permit:
When you first use Bicep to deploy your infrastructure, every resource defined in your Bicep file is new to Azure. As a result, Azure needs to provision each of these resources from scratch. Depending on the nature and number of resources you've defined, this can be an intricate process involving multiple steps, dependencies, and configurations. Naturally, this initial setup tends to take the longest as everything is created anew.
After your resources have been initially set up, any subsequent deployments or updates with Bicep are processed differently. Bicep is designed to be idempotent, meaning it aims to achieve a desired state without redundant operations. In other words, if a resource already exists in the desired state, Bicep won't waste time recreating it.
When you make changes to your Bicep files and deploy again, Bicep will first evaluate the current state of the resources in Azure. It then intelligently determines what has changed since the last deployment. Only these changes are applied, making the process faster and more efficient. This not only saves time but also reduces the potential for errors or disruptions since unchanged resources remain untouched.
Code sample
The complete code and the pipeline can be found in a public Git repository. Feel free to experiment with it and deploy it to your own Azure subscription if you wish. Just make sure to update the service connection name and the app name.
Wrapping Up
For me, it's amazing how easy it is to deploy our infrastructure from Azure DevOps using Bicep. The ease of setting up new environments stands out, and having most of the process automated saves a good chunk of time and cuts down on manual errors.
In the next article, we'll dive a bit deeper, exploring blue-green deployment with Azure App Service slots. So, stay tuned and happy coding!