In the previous post I showed you how you can debug your bot locally by using Teams and ngrok. In this post I'm going to show you how to deploy the bot to Azure so that you can share it with others. We're going to do this only with Visual Studio to keep things simple
🔹 Deploying the bot from Visual Studio
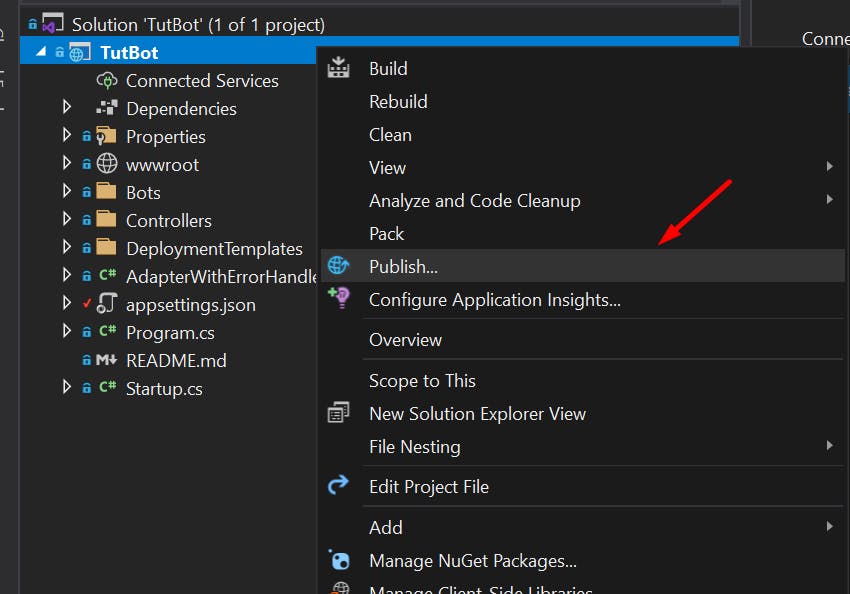
- Right click on the project, then click on Publish
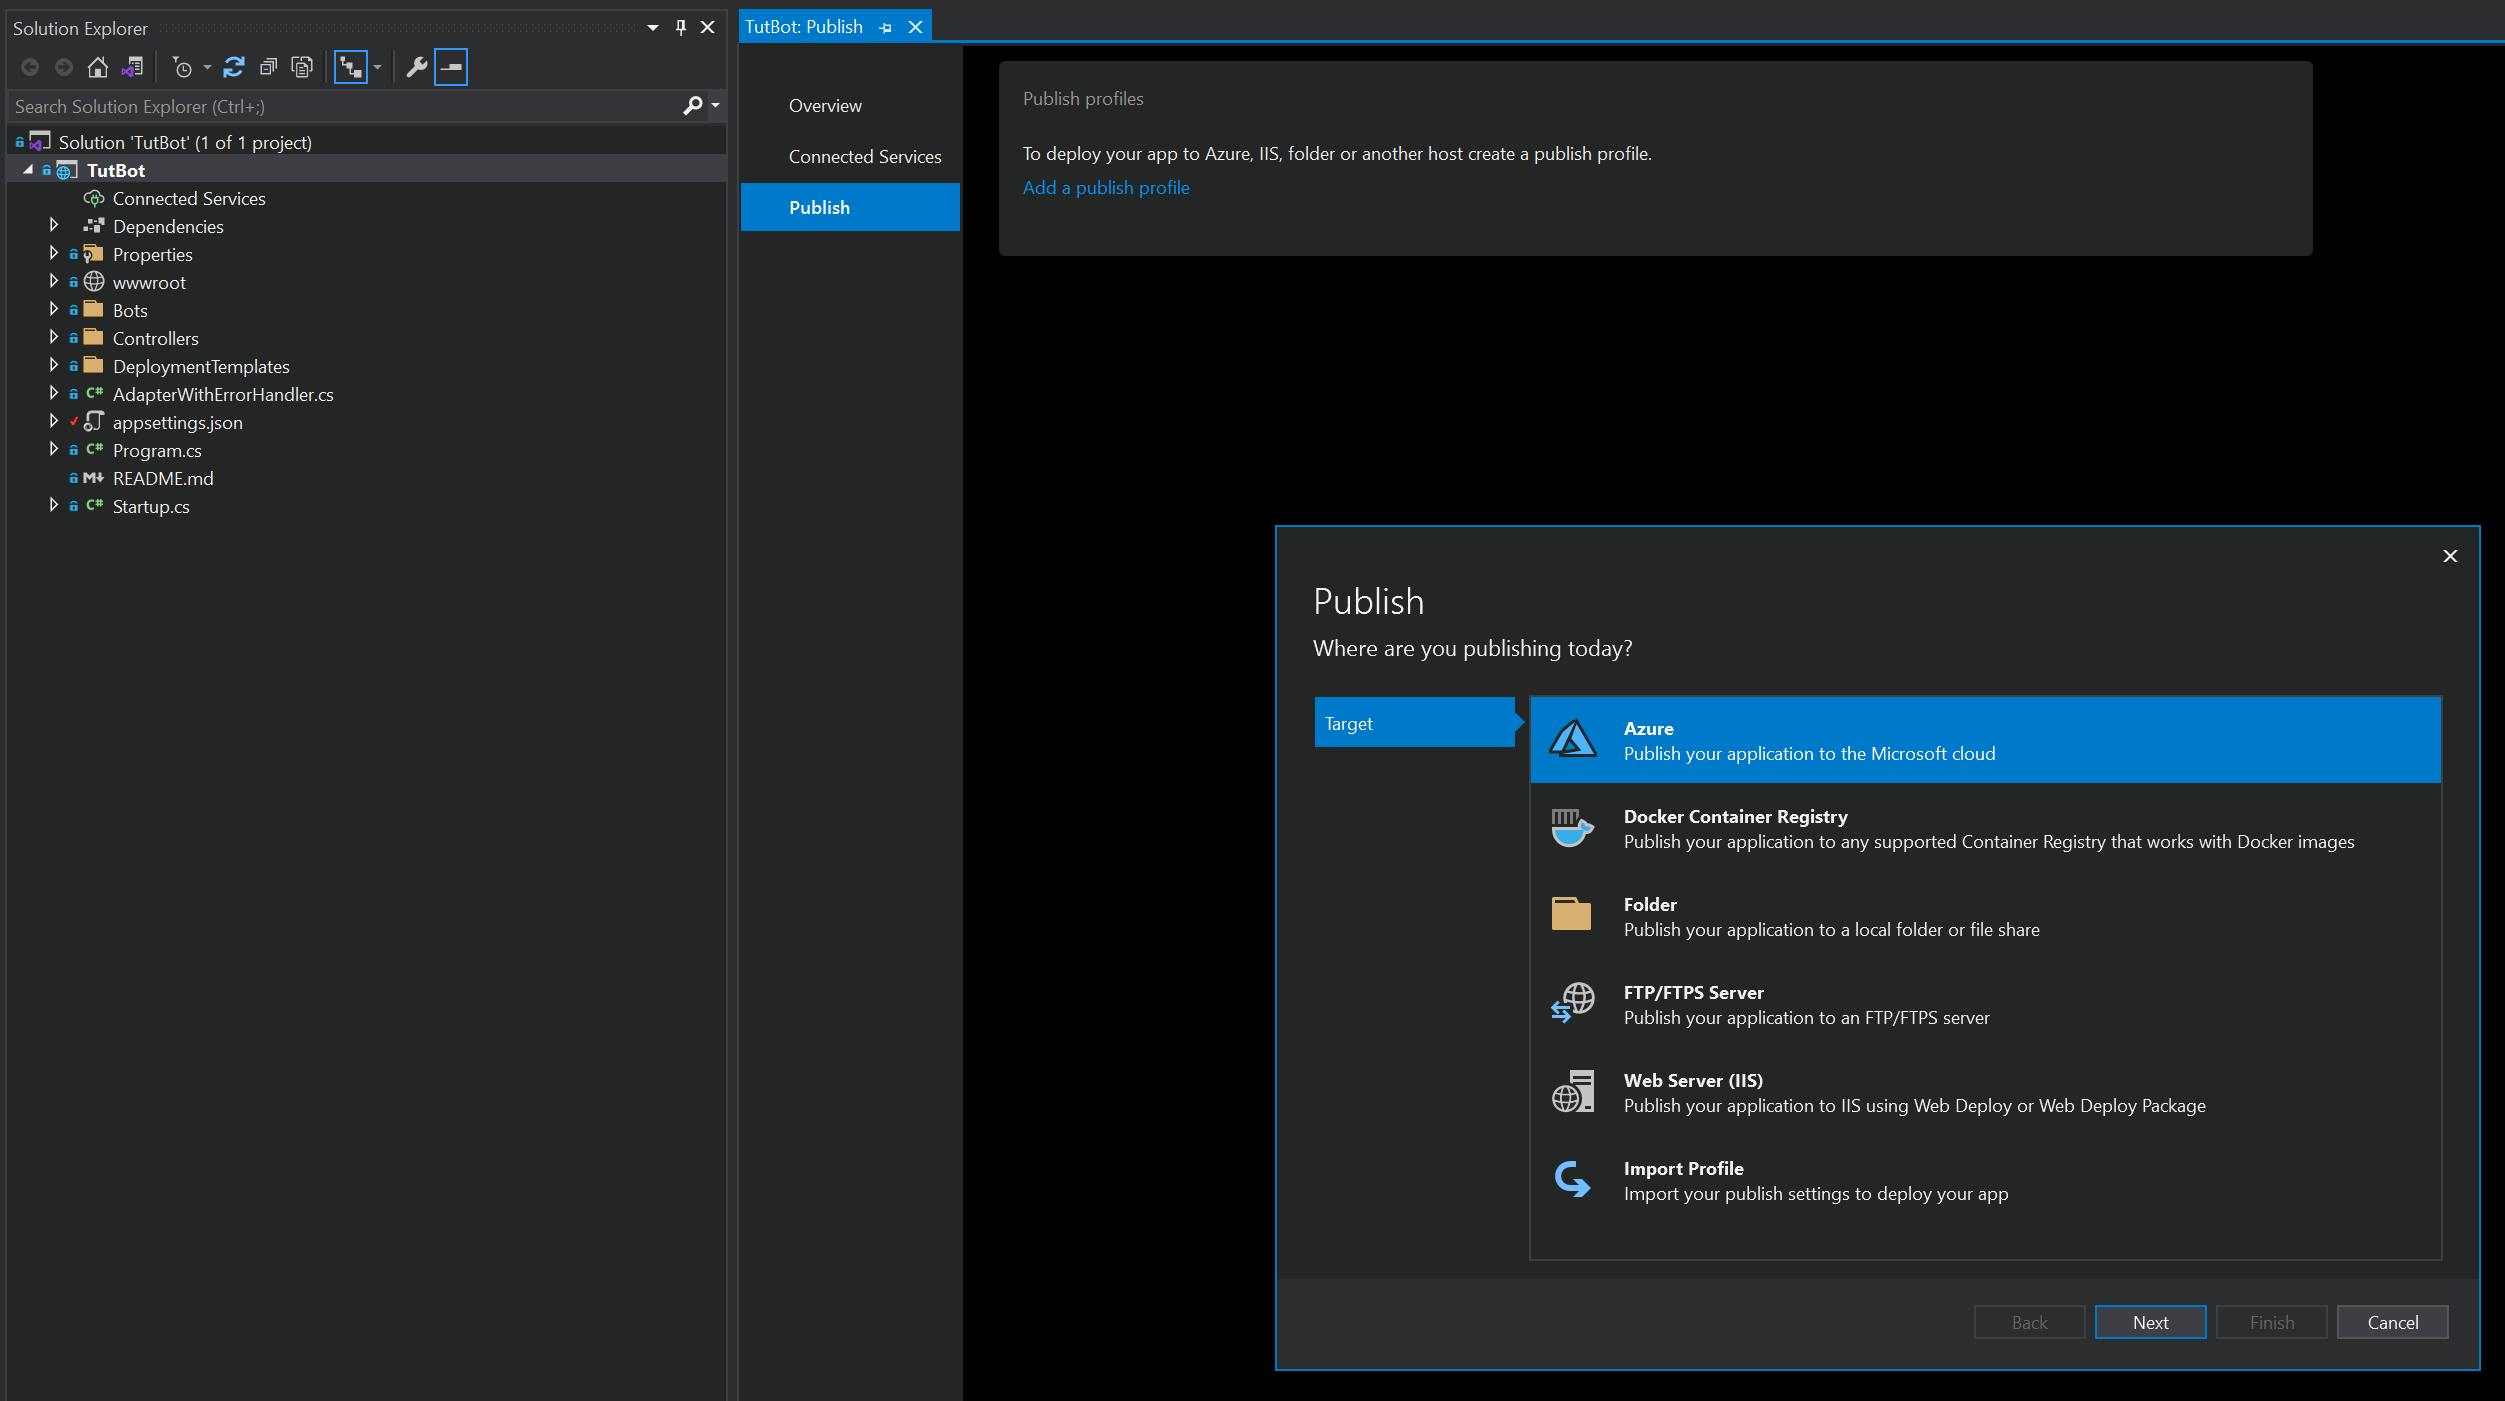
- Choose Azure as the publish location and click on Next
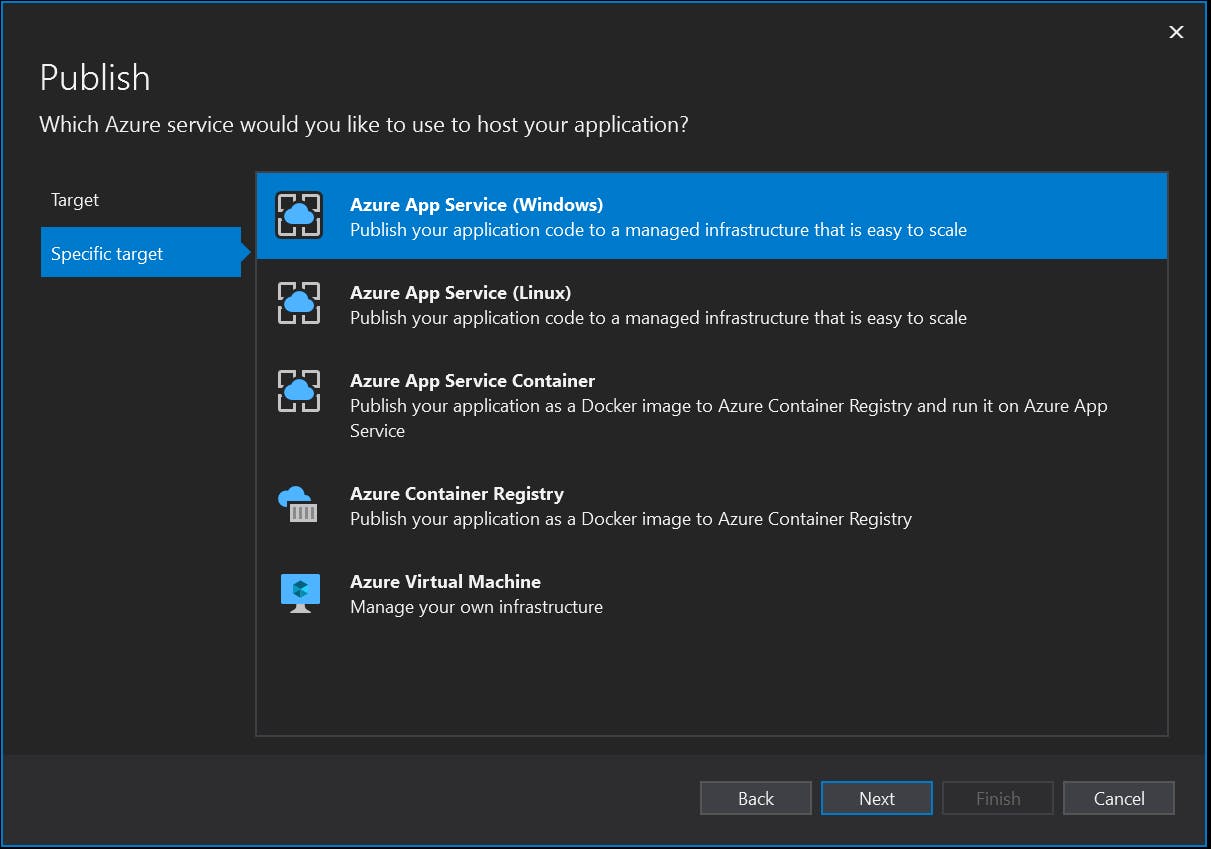
- Choose "Azure App Service (Windows)" and click on Next
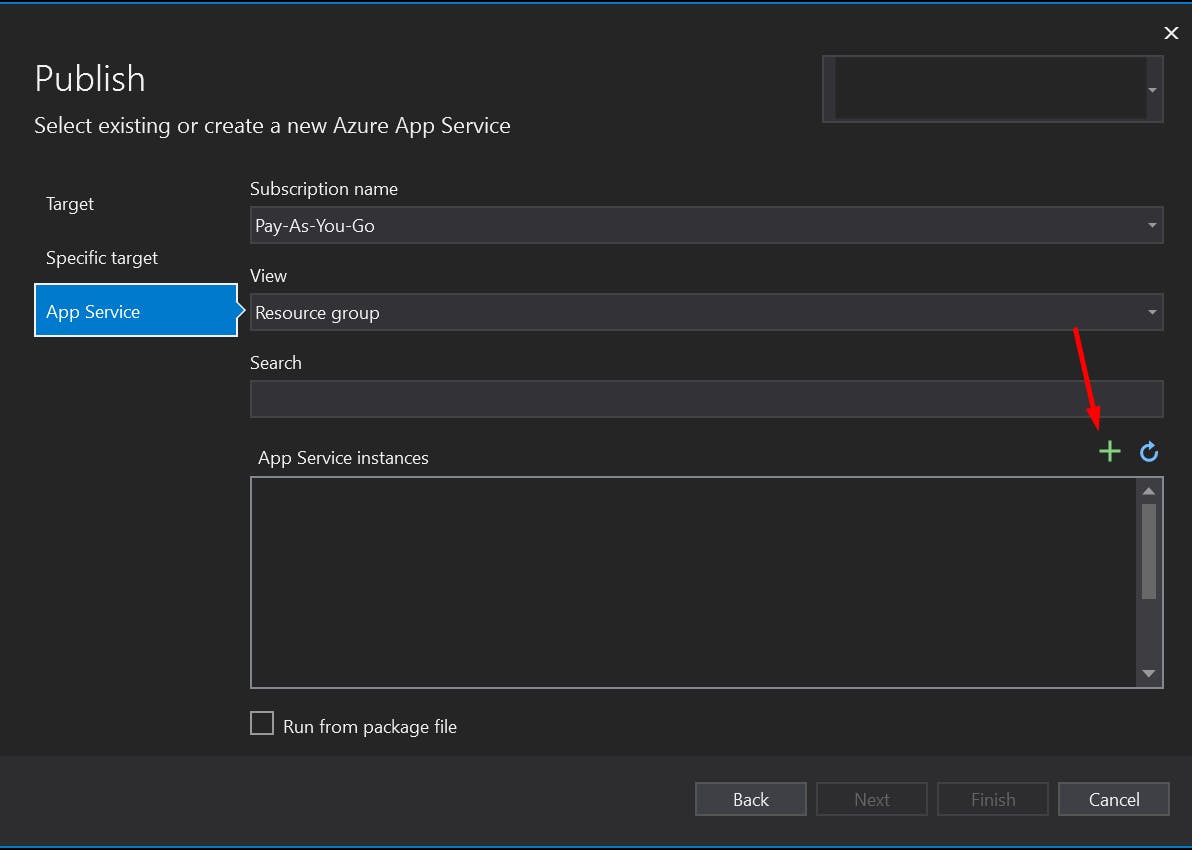
- Click on the green "+" button
- Choose or create a resource group and a hosting plan
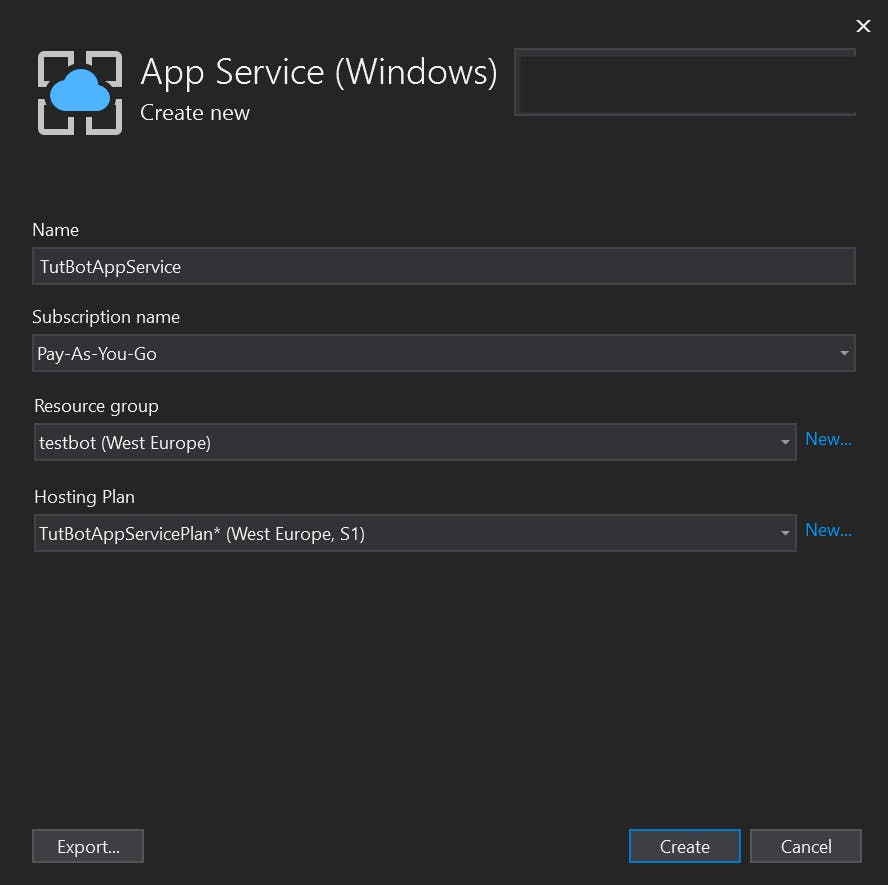
Click on Create
Wait for the deployment to be complete, and click on Finish once it's done
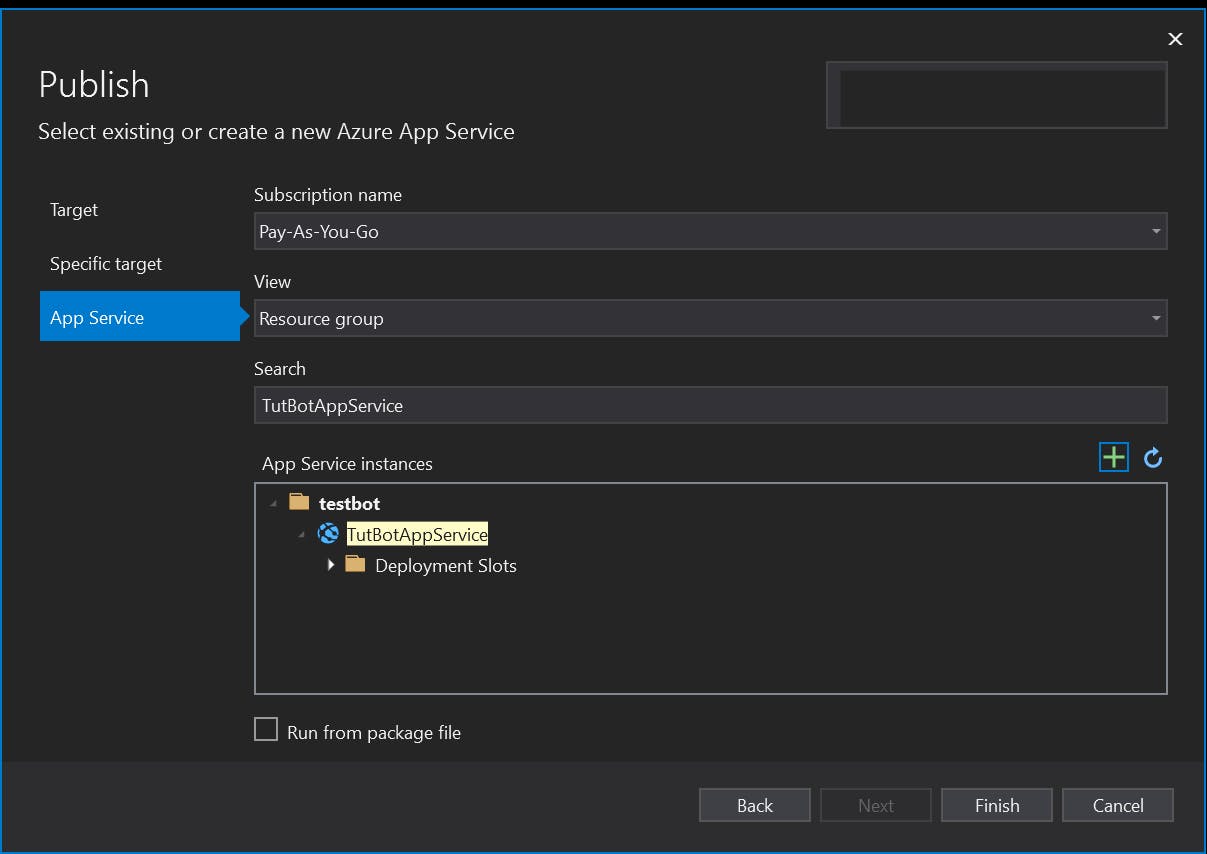
- Click on Publish
Once everything is done, you should be able to navigate to the resource group you used for the deployment and see these resources:
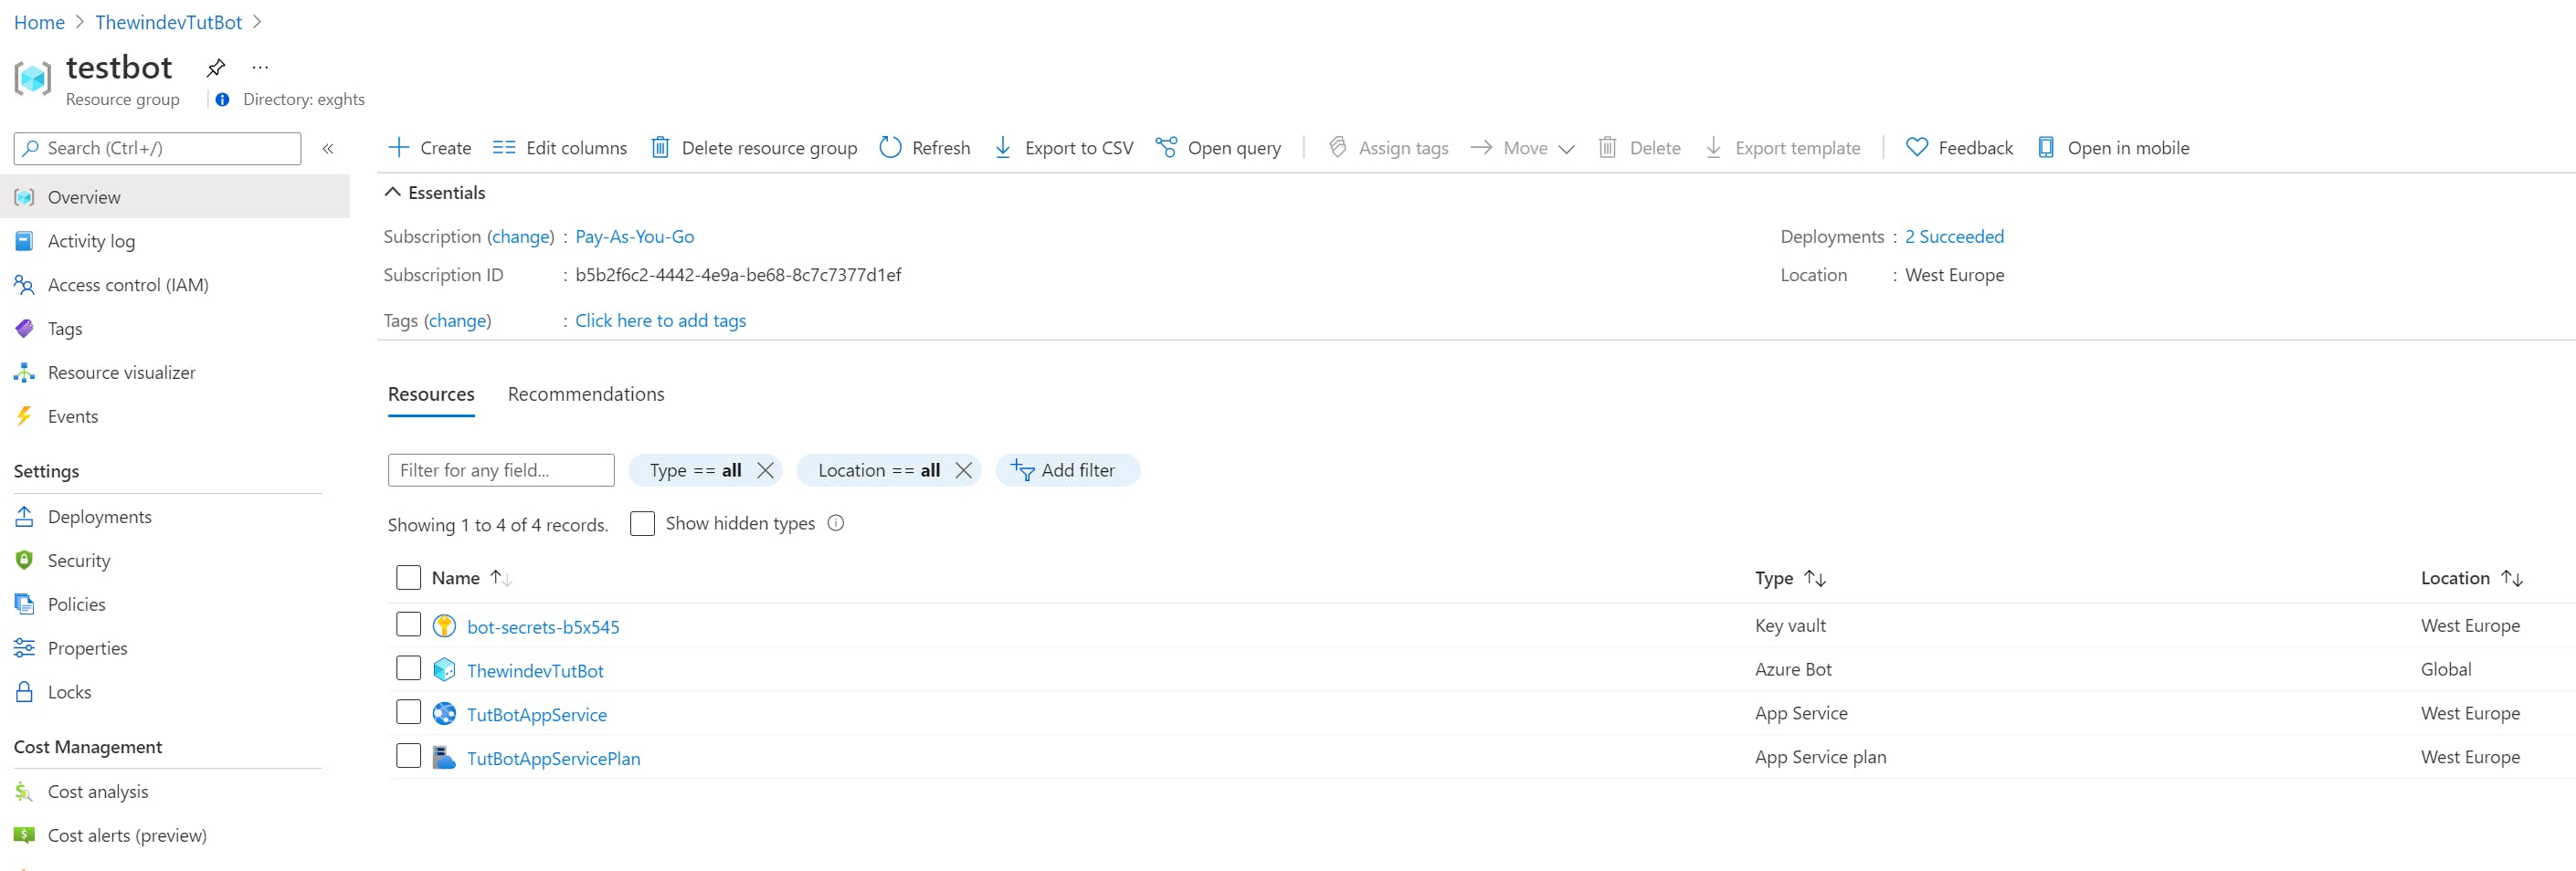
We have one more thing to do here, and that is to set our MicrosoftAppId and MicrosoftAppSecret settings inside the app service.
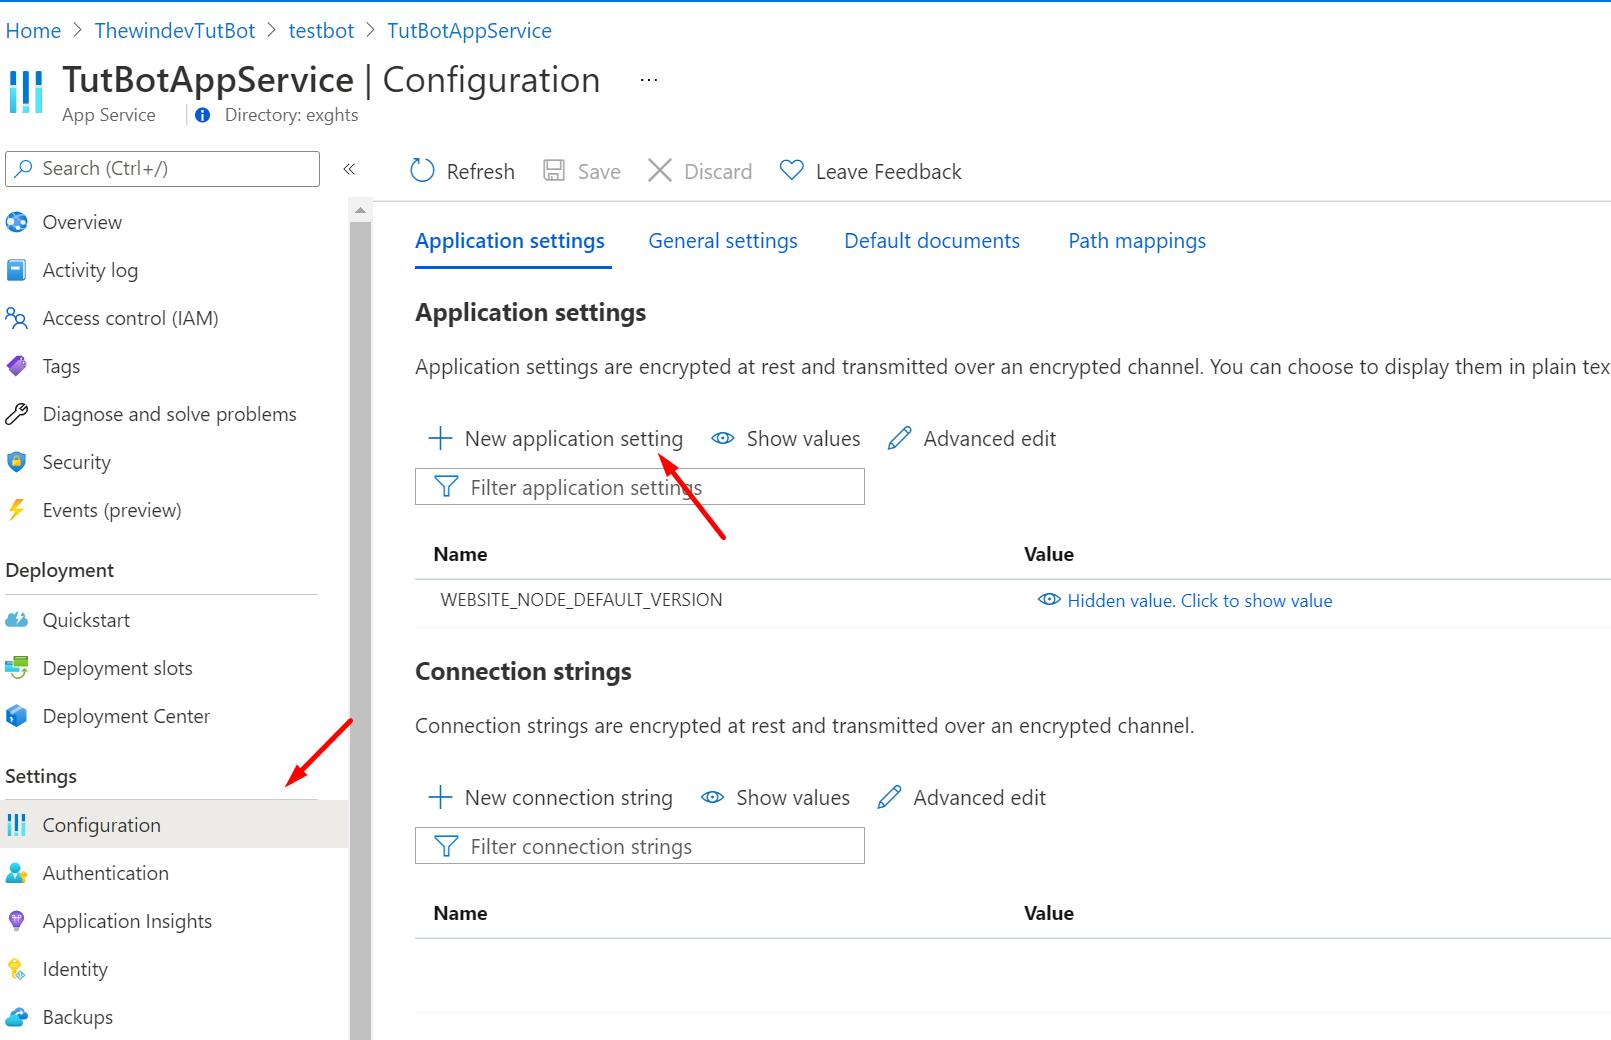
- Open the app service and go to Configuration -> New application setting
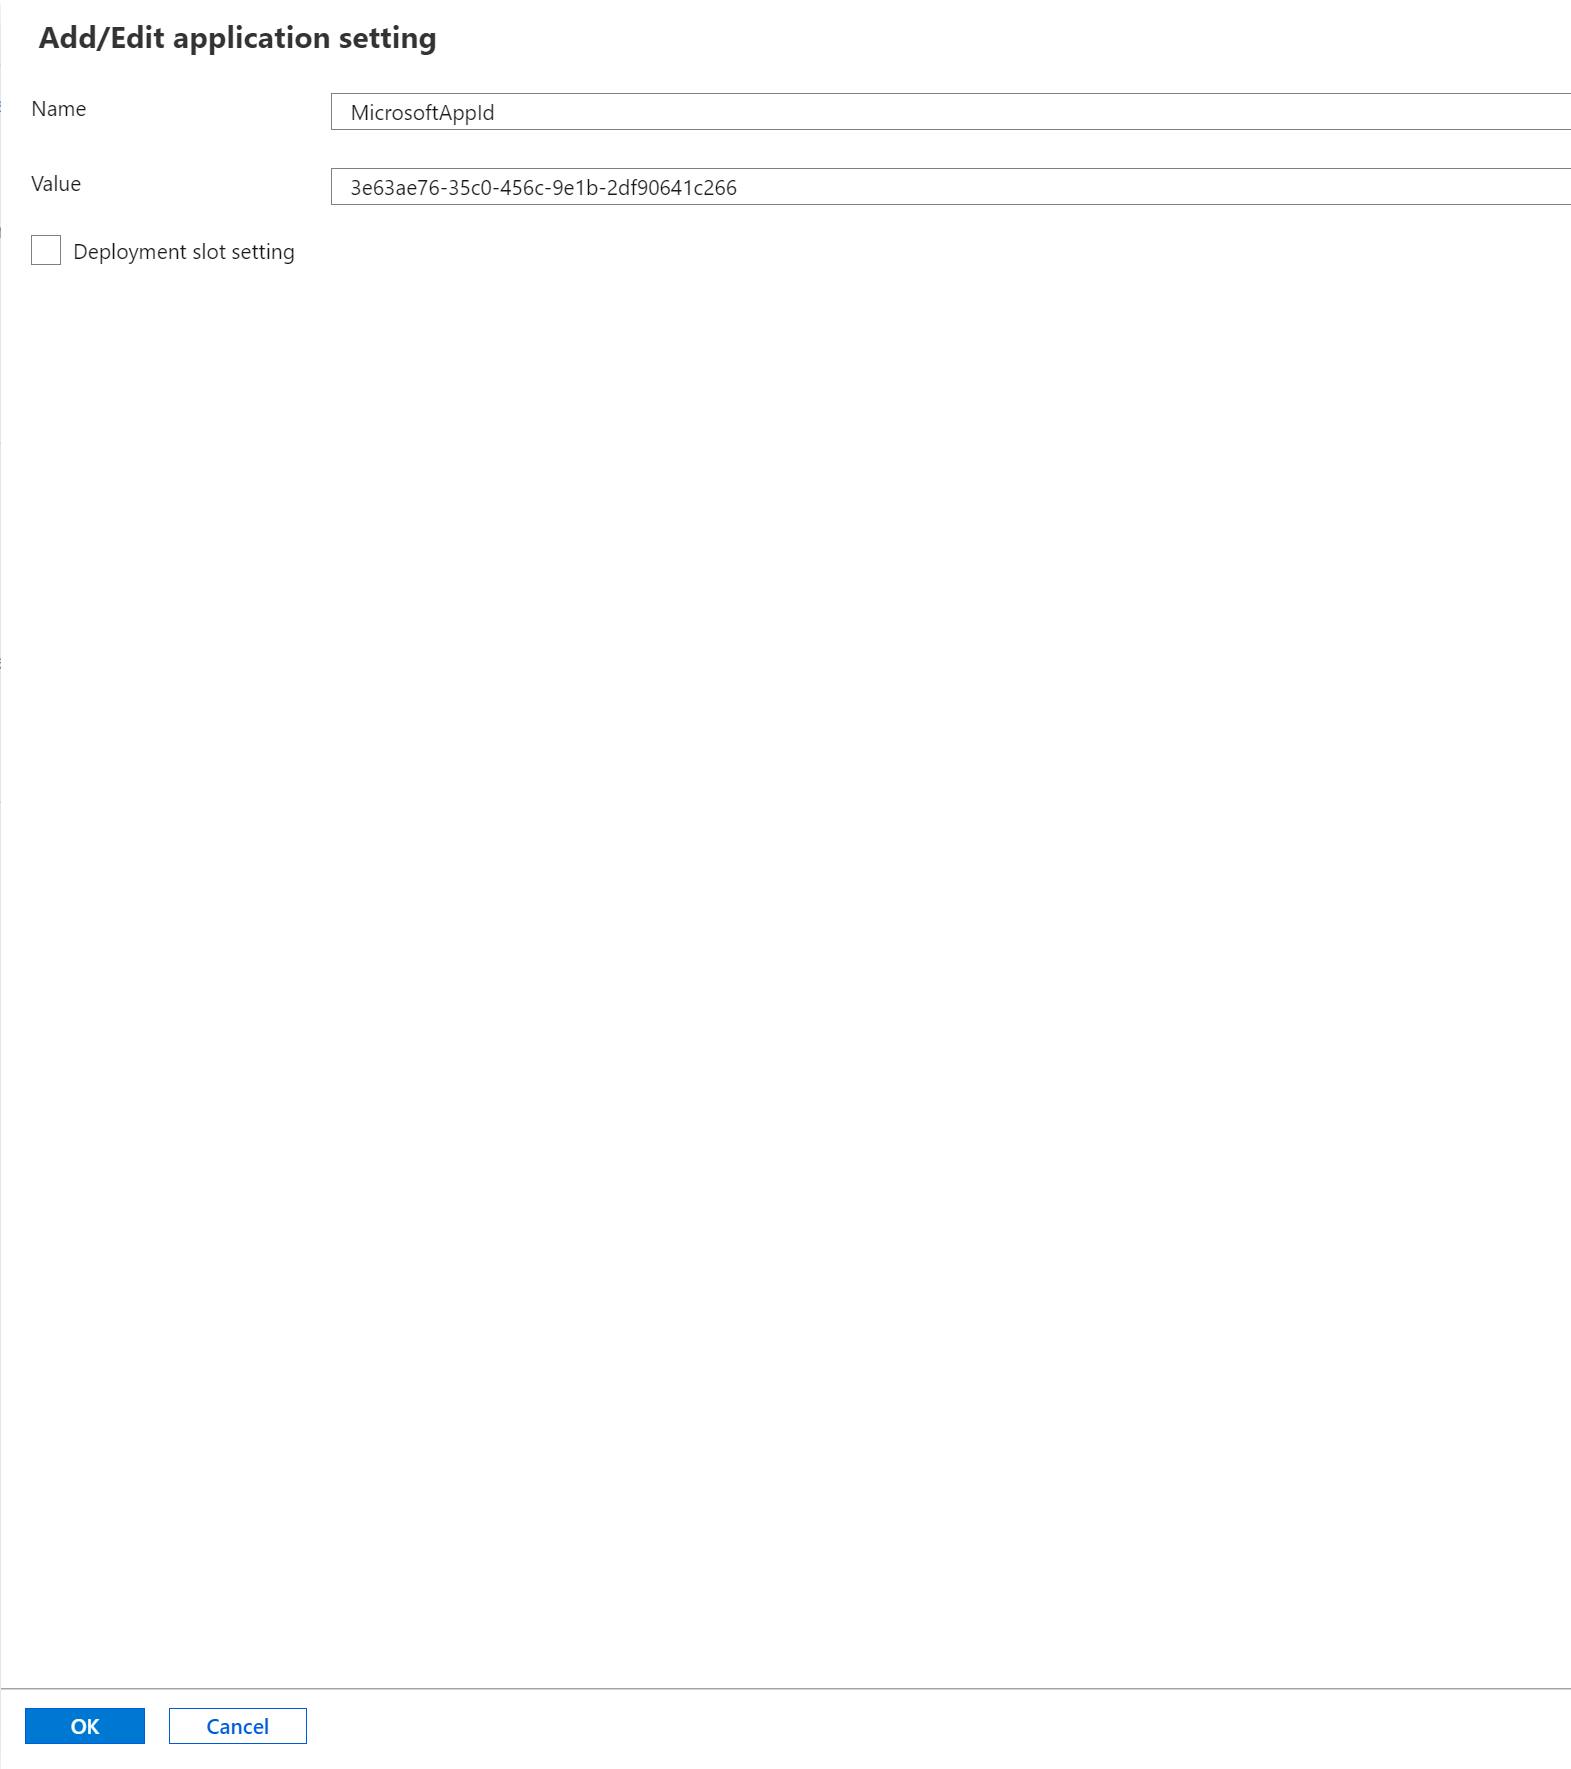
- Use MicrosoftAppId for the name and your app id for the value, then click on OK
Repeat step 10 for MicrosoftAppSecret
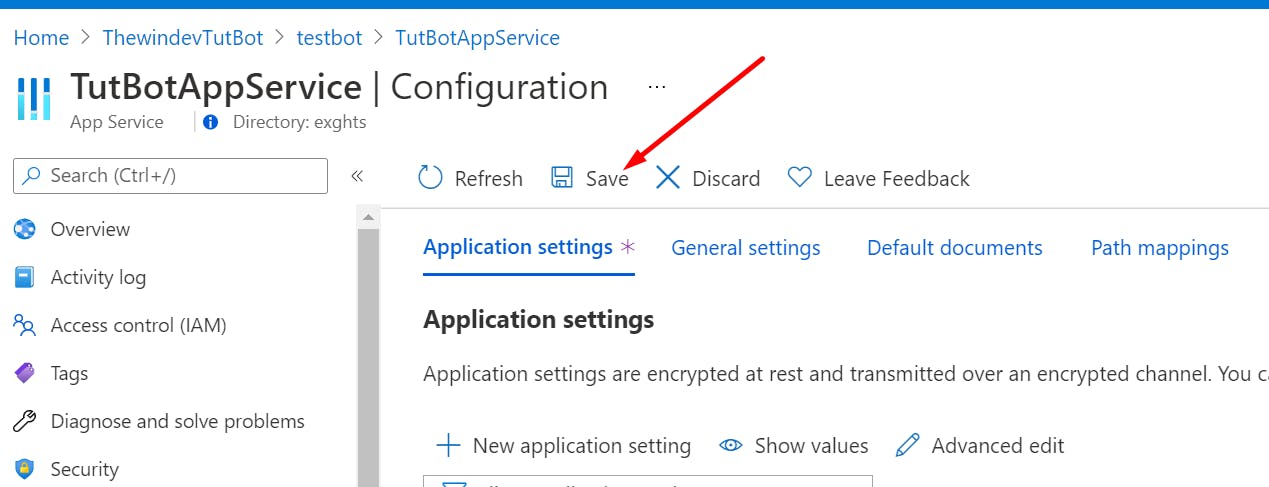
Click on Save -> Continue
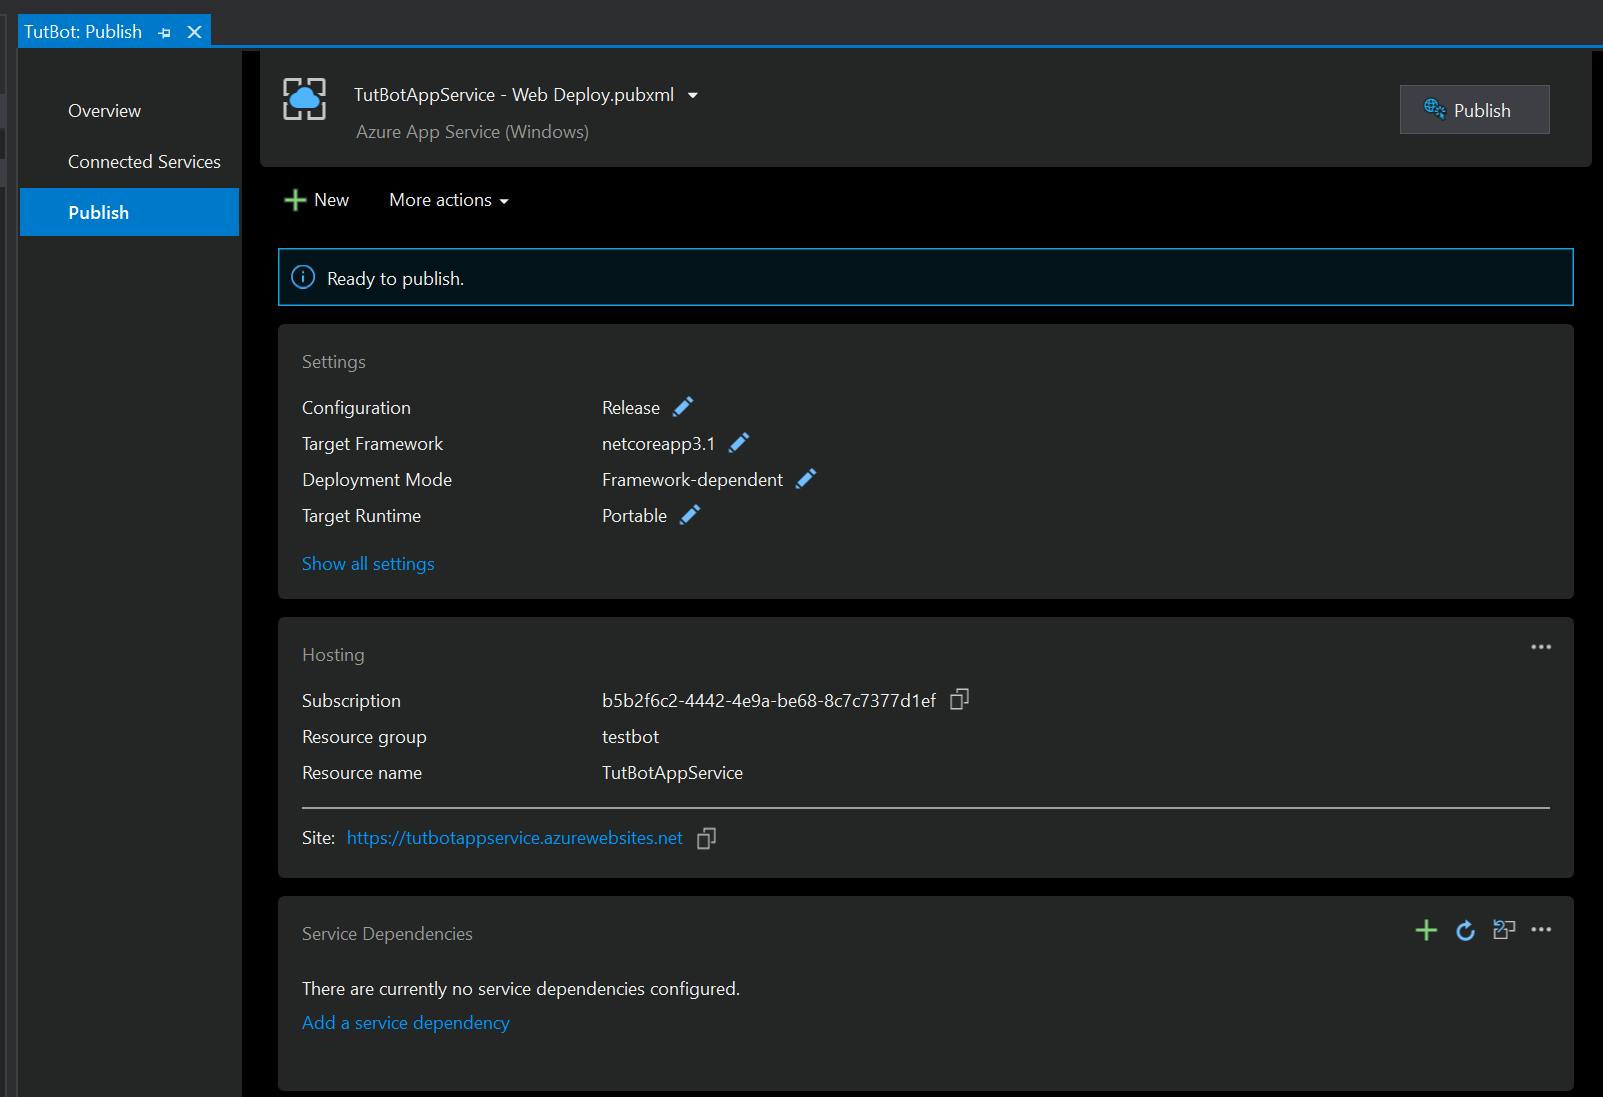
- Grab the URL for the app service, you can do this either from Azure or from the Publish screen in Visual Studio. I added screenshots for both options.
Azure

Visual Studio
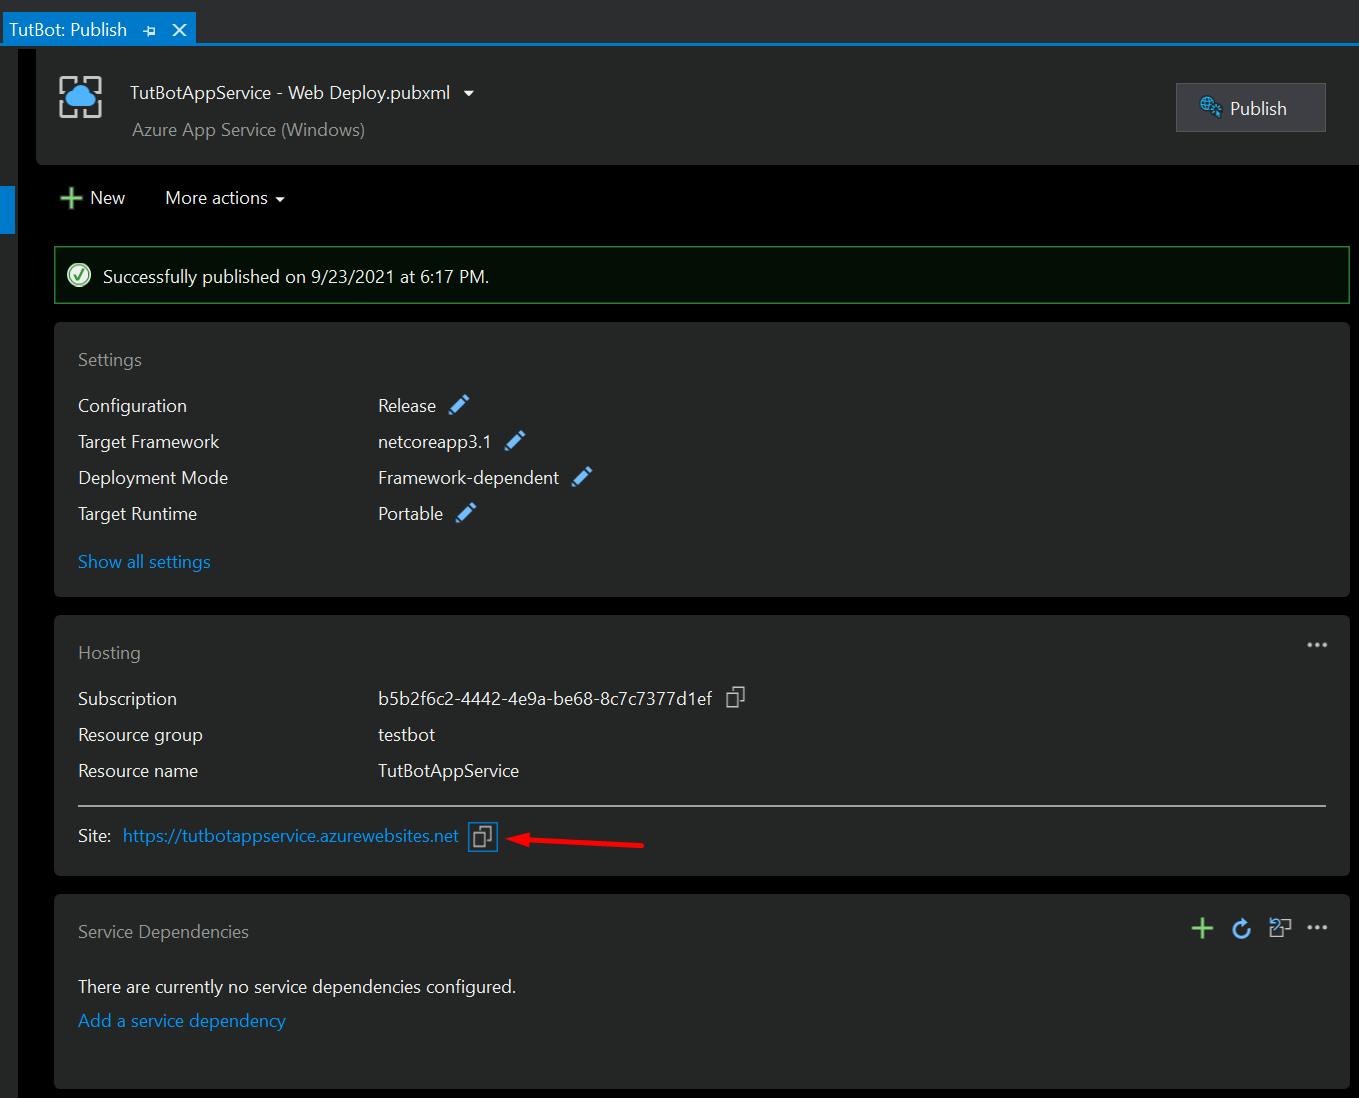
- Copy and paste the URL inside the bot Configuration page -> Messaging endpoint. This is really important, make sure you append /api/messages to it
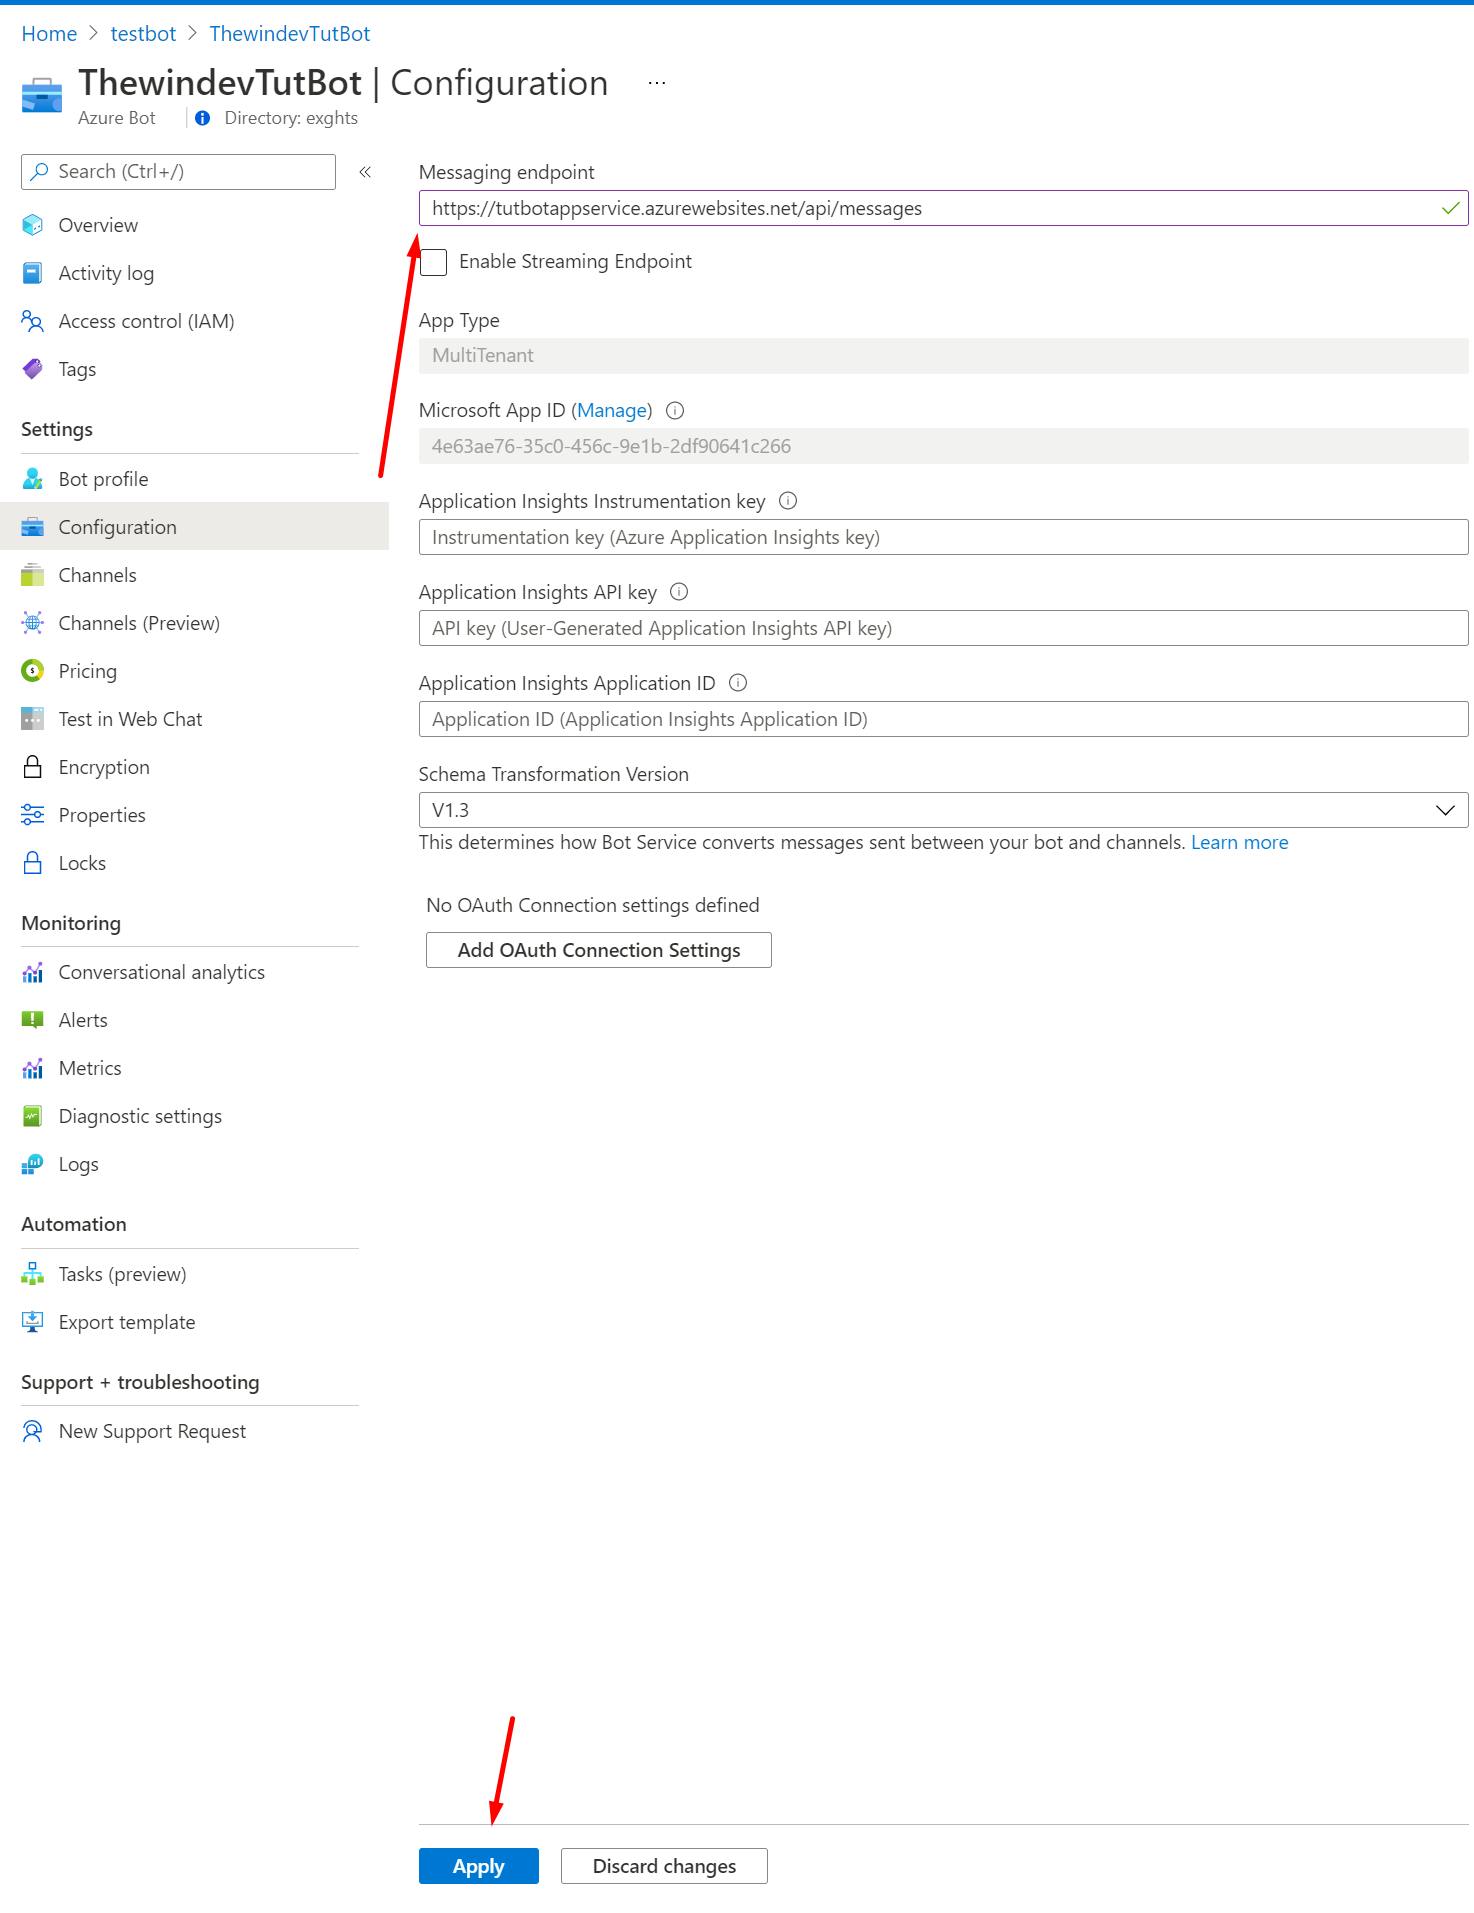
- Click on Apply
Now the only thing that's left to do is to communicate with the bot. I already described this in the previous post, but I'll summarize it here: go to our bot resource -> Channels -> Add a featured channel for Teams -> Click on it -> A new browser window will open with MS Teams and our bot conversation.

The entire process should take less than 10 minutes, but there are other(better) ways of doing this which I'm going to cover in other articles. For now, if CI/CD is not important for you, this method should work just fine.

