Creating a bot with the Bot Framework SDK

Expert generalist • Independent Contractor • Microsoft MVP • Home Assistant enthusiast Hi there! I'm Bogdan Bujdea, a software developer from Romania. I'm currently a .NET independent contractor, and in my free time I get involved in the local .NET community or I'm co-organizing the @dotnetdays conference. I consider myself an expert generalist, mostly because I enjoy trying out new stuff whenever I get the chance and I get bored pretty easily, so on this blog you'll see me posting content from programming tutorials to playing with my smart gadgets.
In the past few months I worked on creating a Microsoft Teams bot using the Bot Framework SDK so I think I have some useful knowledge to share about this topic. In this series of articles I want to show you how you can create your own Teams bot starting from scratch, and then we'll do more complex scenarios like SSO authentication with Microsoft Graph/Microsoft Dynamics 365, using adaptive cards and pushing them to their limits, etc.
In this article I'll show you how you can create your bot from scratch in C# and talk to it from the Bot Emulator. In the next article we'll connect to it from Teams as well.
Content
🔹1. Creating a bot using C#
🔹2. Connect to the bot using the Bot Emulator
🔹 1. Creating a bot using C
Prerequisites
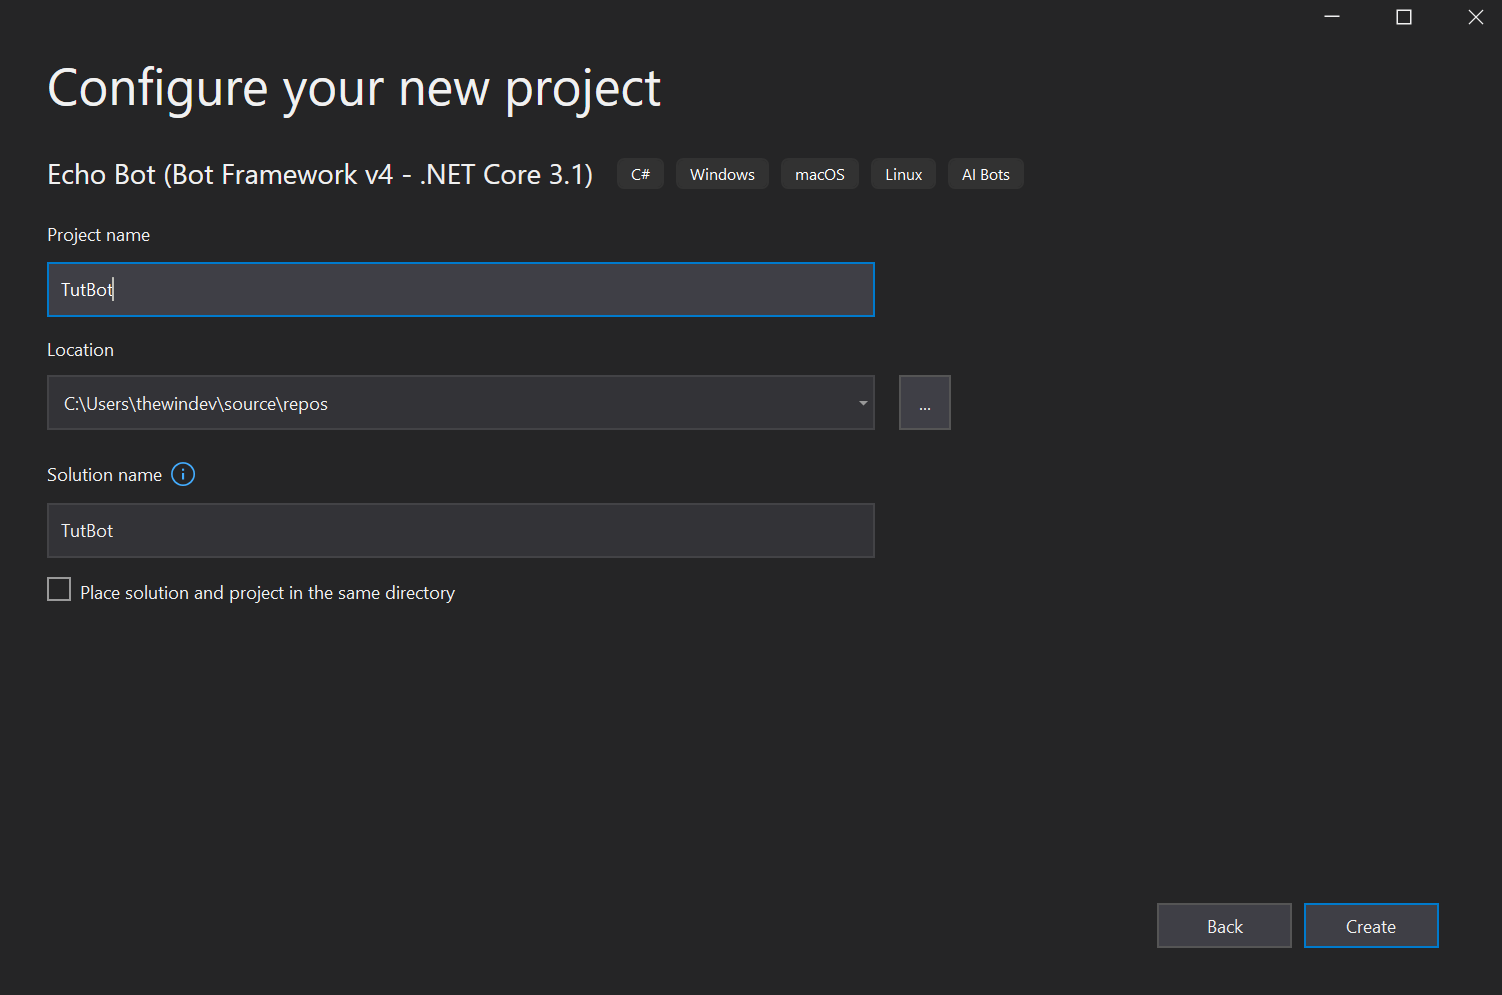
Once you installed everything, the first step is to open Visual Studio and create a new "Echo Bot" project like in the screenshot below (make sure you're using the 3.1 version).
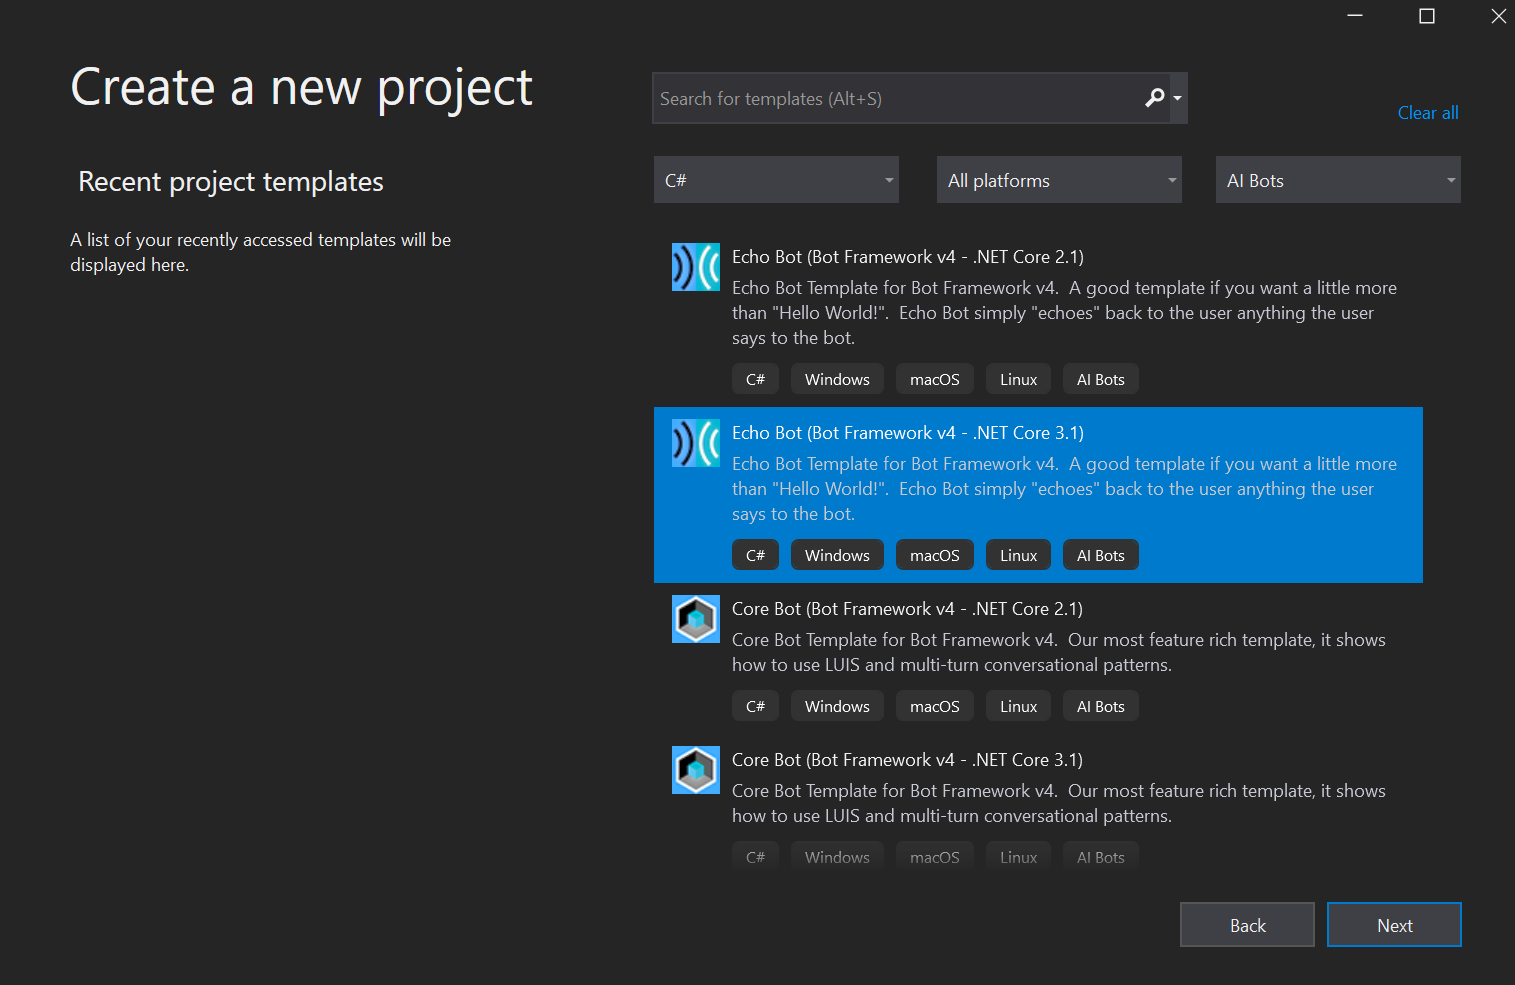
This template will automatically install the Microsoft.Bot.Builder.Integration.AspNet.Core Nuget package and create a basic bot that will reply with any text you send it. After this, pick a name for your bot and click on Create.
2. Connect to the bot using the Bot Emulator
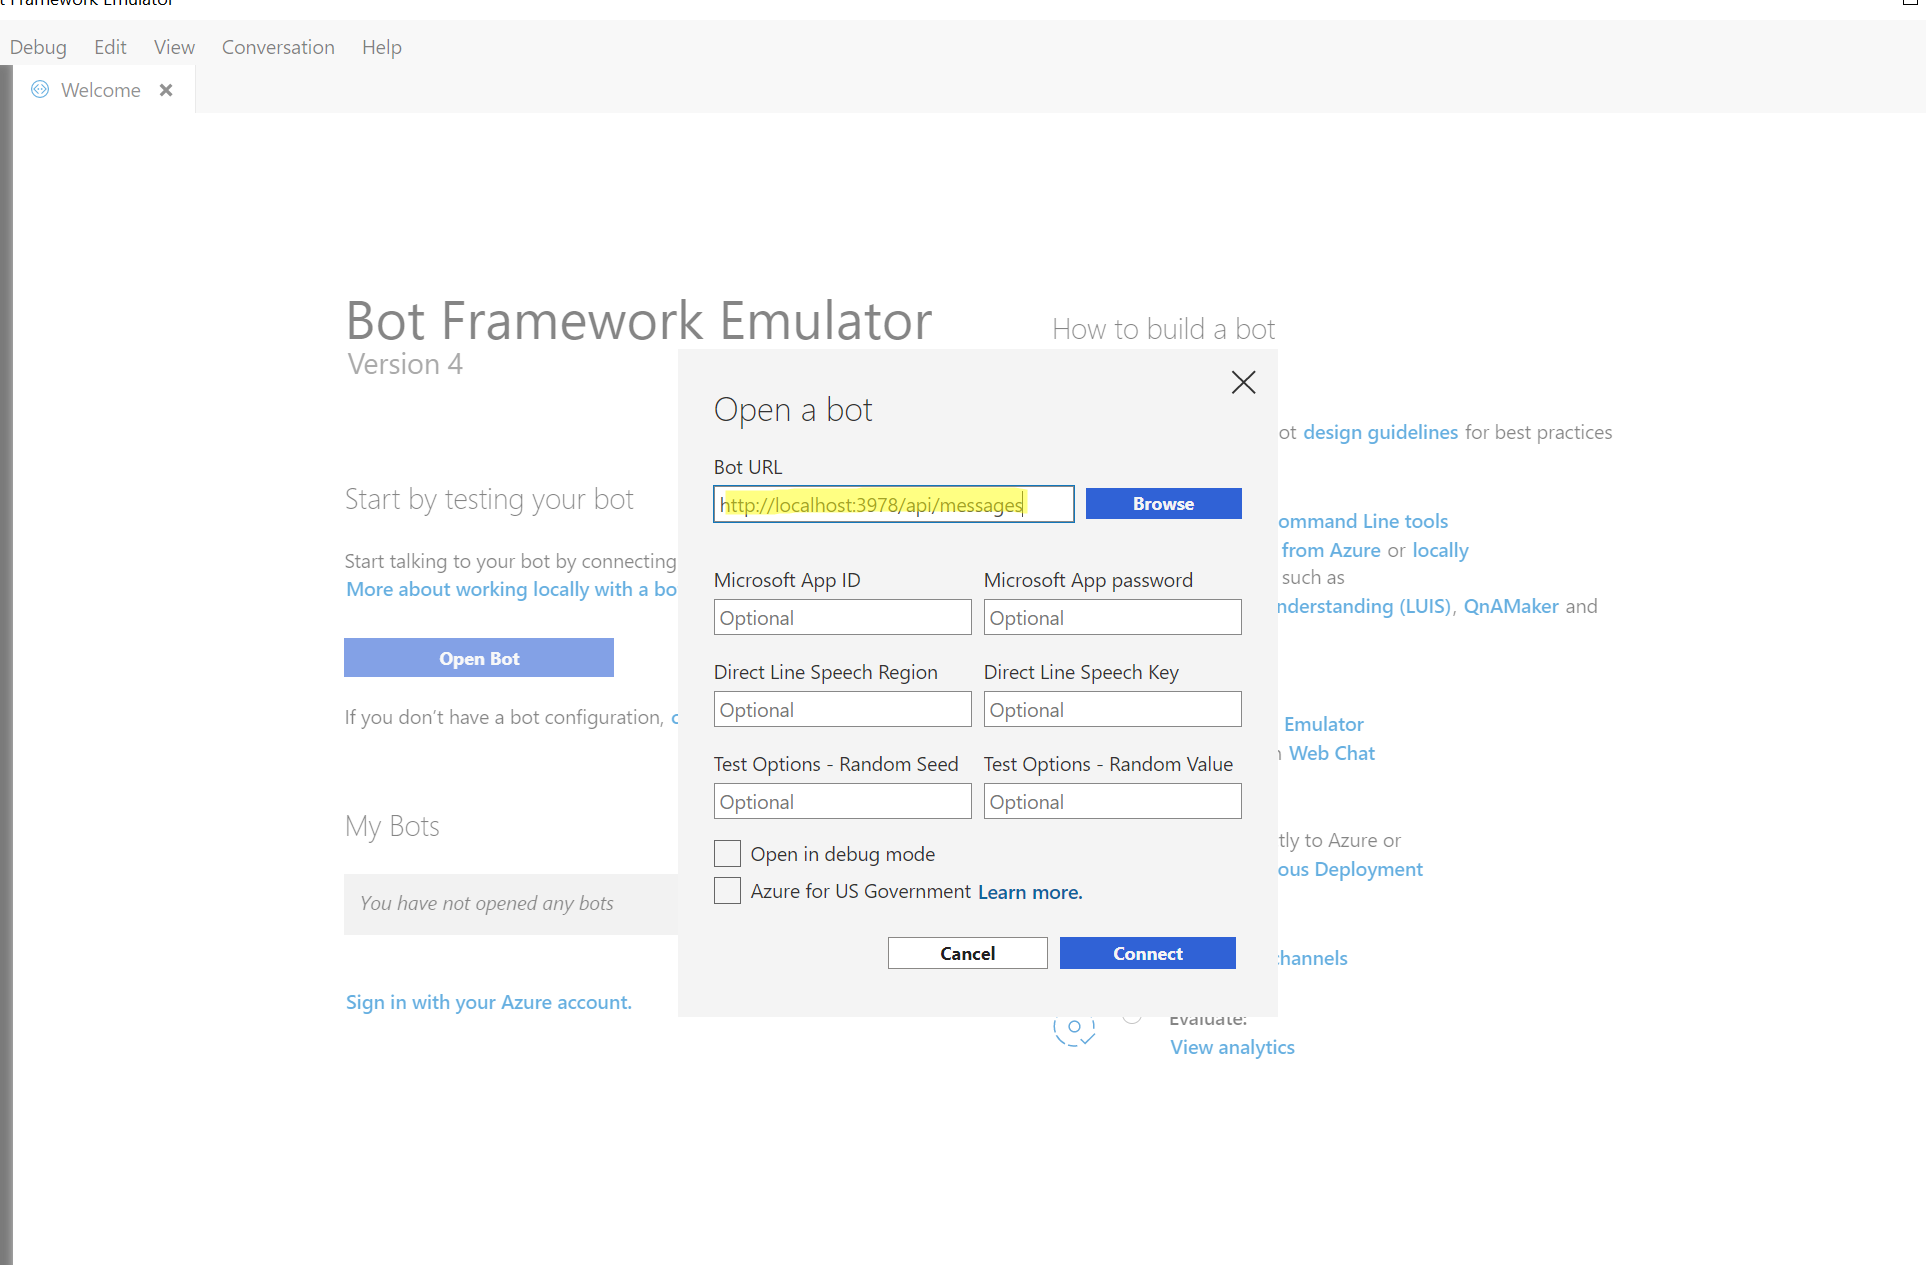
Once the solution is ready, you just have to run your bot (hit F5) and then we'll connect using the Bot Framework Emulator. If everything went fine, you should see this page:
 From this page we'll need the bot URL, in my case it's http://localhost:3978/api/messages
I will take this URL and put it in the Bot Framework Emulator, and then hit Connect.
Now we can send the first message:
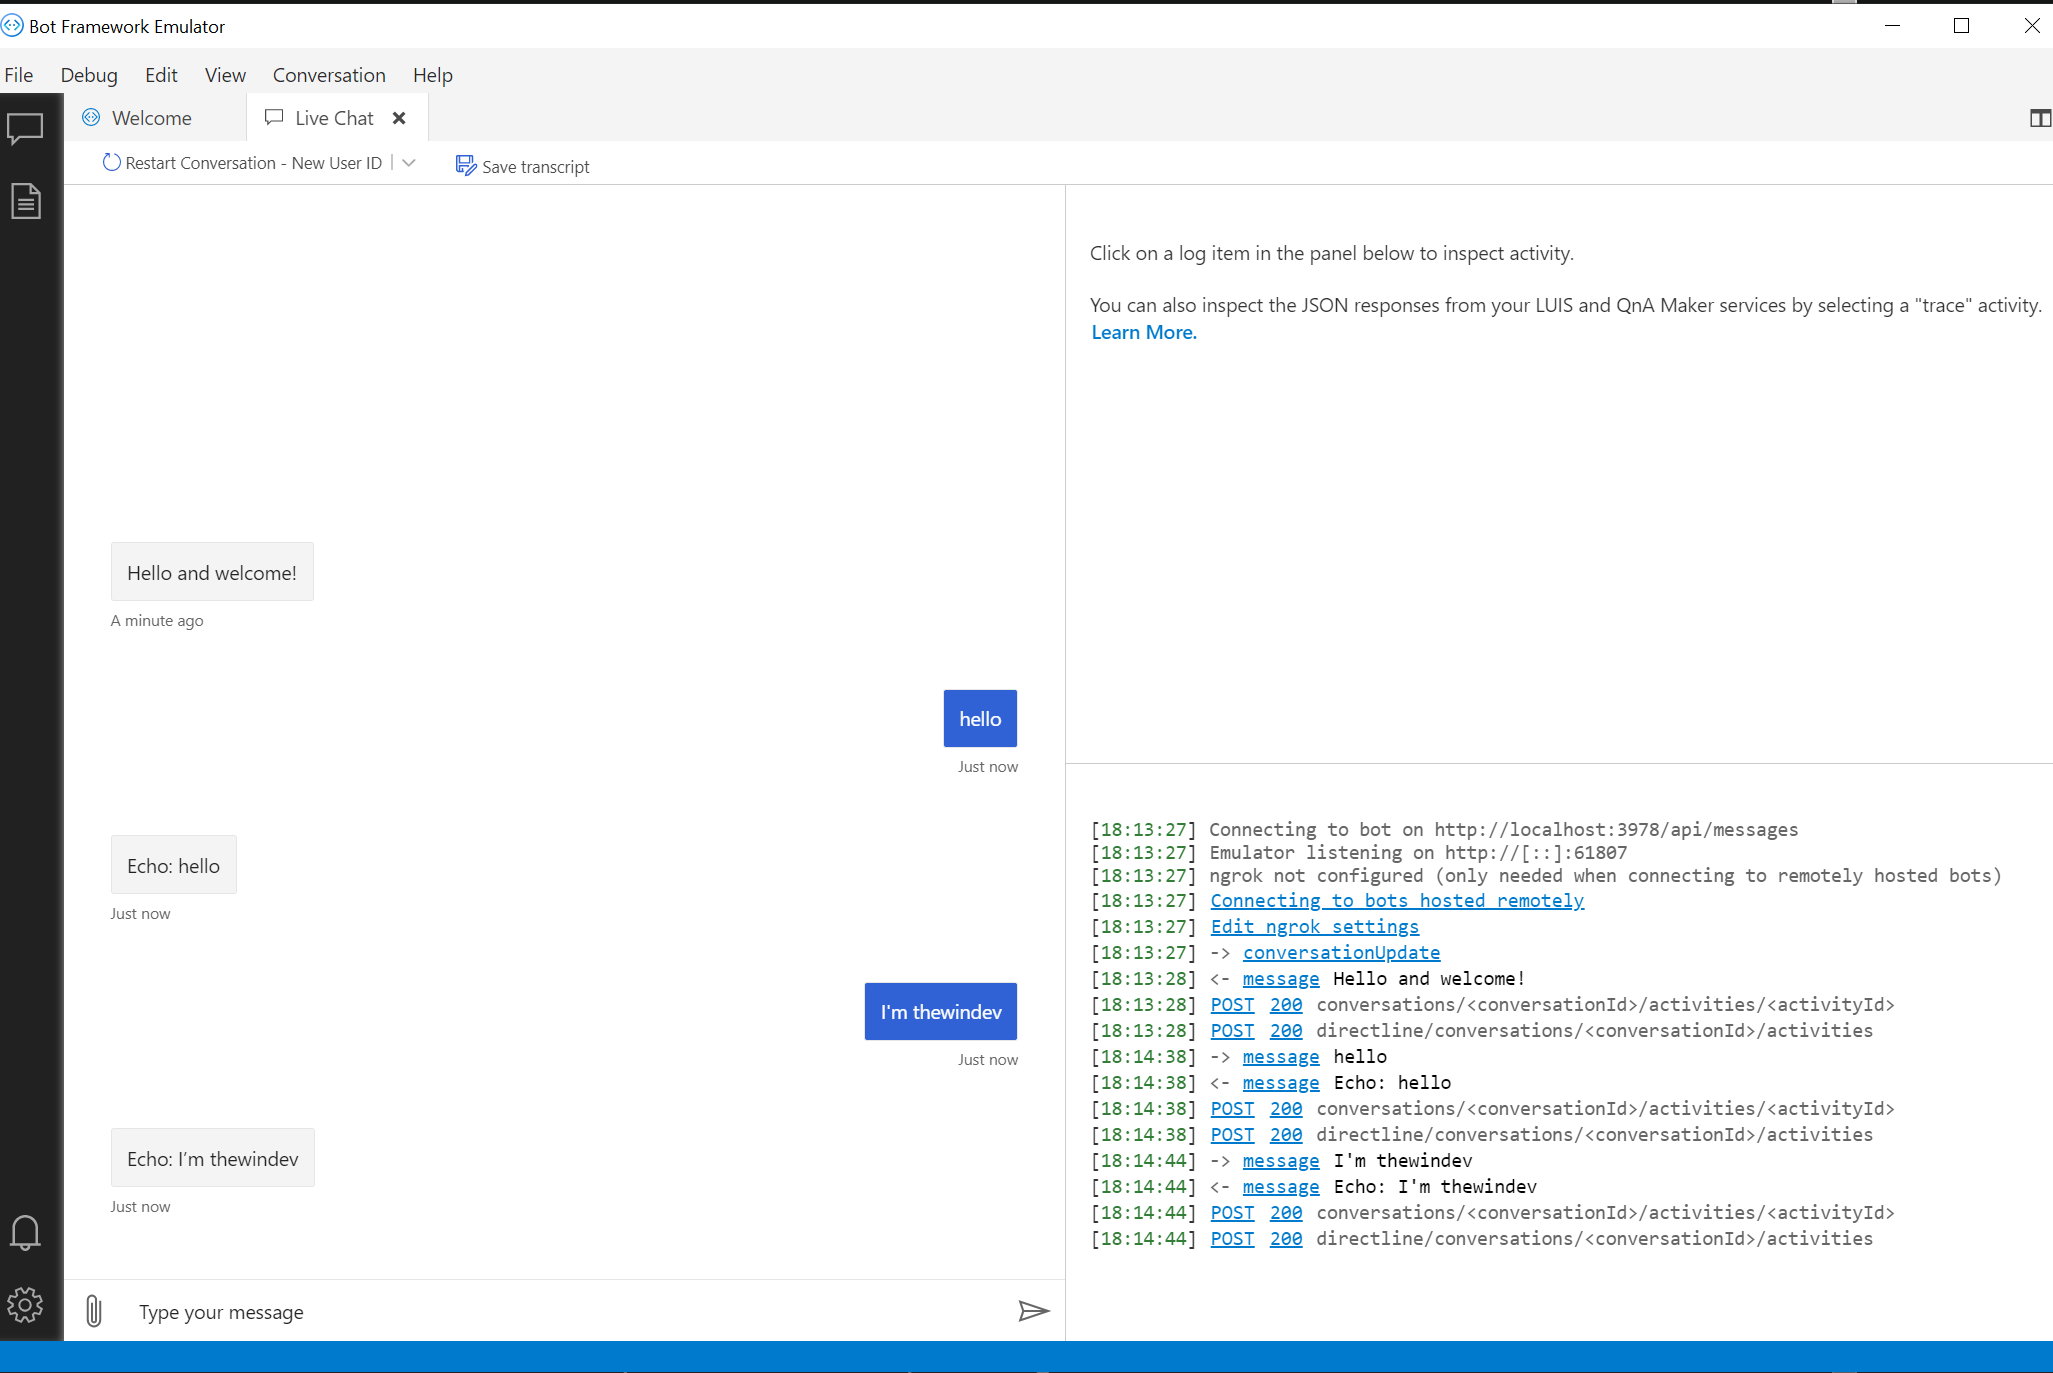
As you can see, everything I type is sent back to me by the bot.
How it works
Now, I want to explain you how everything works, so let's head back to Visual Studio and look at the solution.
The "magic" starts in the file "BotController.cs". This is a basic ASP.NET controller with only one endpoint, POST/GET on /api/messages. In this endpoint you can see that there's a simple call:
await Adapter.ProcessAsync(Request, Response, Bot);
Once this line is executed, the method "OnMessageActivityAsync" from EchoBot.cs is invoked. But how exactly does it do this? Well, if you look in the constructor, you can see that the BotController receives two parameters, an IBotFrameworkHttpAdapter and an IBot.
public BotController(IBotFrameworkHttpAdapter adapter, IBot bot)
{
       Adapter = adapter;
       Bot = bot;
}
If you now look in Startup.cs, we do the following service registrations:
services.AddSingleton<IBotFrameworkHttpAdapter, AdapterWithErrorHandler>();
services.AddTransient<IBot, EchoBot>();
So every GET/POST on /api/messages will be processed by our EchoBot and the OnMessageActivityAsync is just one of the ways it can interpret it.
Here, you can see that we do two things:
protected override async Task OnMessageActivityAsync(ITurnContext<IMessageActivity> turnContext, CancellationToken cancellationToken)
{
      var replyText = $"Echo: {turnContext.Activity.Text}";
      await turnContext.SendActivityAsync(MessageFactory.Text(replyText, replyText), cancellationToken);
}
First, we take the text send by the user, this can be found in turnContext.Activity.Text. Then, we send this text back using the method SendActivityAsync() from turnContext.
There's also a call to MessageFactory.Text() here. This is because we are actually sending an Activity, but an activity can be of multiple times and we just send text, hence the call to MessageFactory.Text. In a future blog post from this series we'll send other types of activities as well.
That's it for this article, I don't want to make it too long. In the next one we'll connect to the bot from Microsoft Teams, so if you want to learn more you can subscribe to the newsletter or you can follow me on Twitter.