One of the biggest struggles I had with Node-Red was passing parameters from one place to another. If you want to keep your flows clean and reuse most of your logic instead of duplicating it, then you must know how to send data from one node to another or between subflows. I know there's documentation about this but even so, I found it hard to read and most of the stuff I did was by trial and error. That's why the following articles will help you save those hours I spent trying to figure this out, so let's begin with JSONata.
JSONata
{
    "color_name": "red",
    "brightness": 255
}
When you want to call a Home Assistant service using Node-Red, you have to pass the data as a JSON, like the one above. For example, you could use this one to change the state of a light if you use it in a "call service" node. But what if you want to use red during the day and blue during the night, does this mean you should create one node for each option? Of course no, this is why we have JSONata:
A declarative open-source query and transformation language for JSON data.
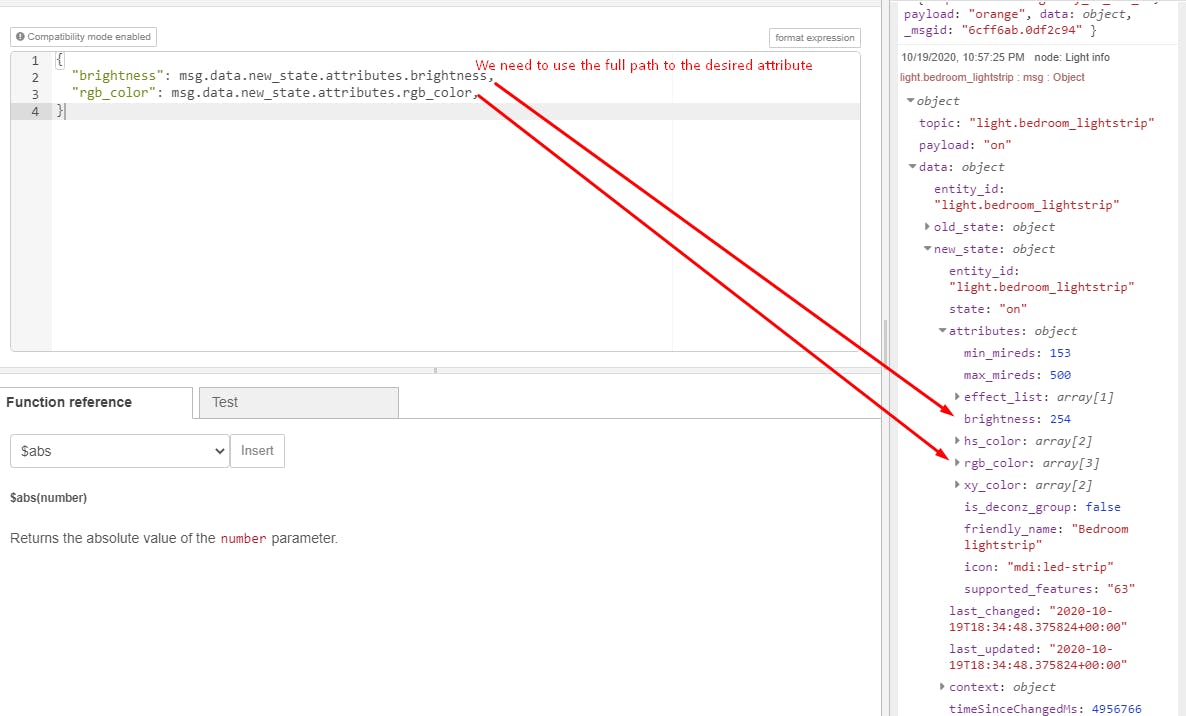
Basically, JSONata enables you to put variables in a JSON. All you have to do is to select JSONata expression instead of JSON inside the node, and use the full path to the property that you need.

Syncing two lights
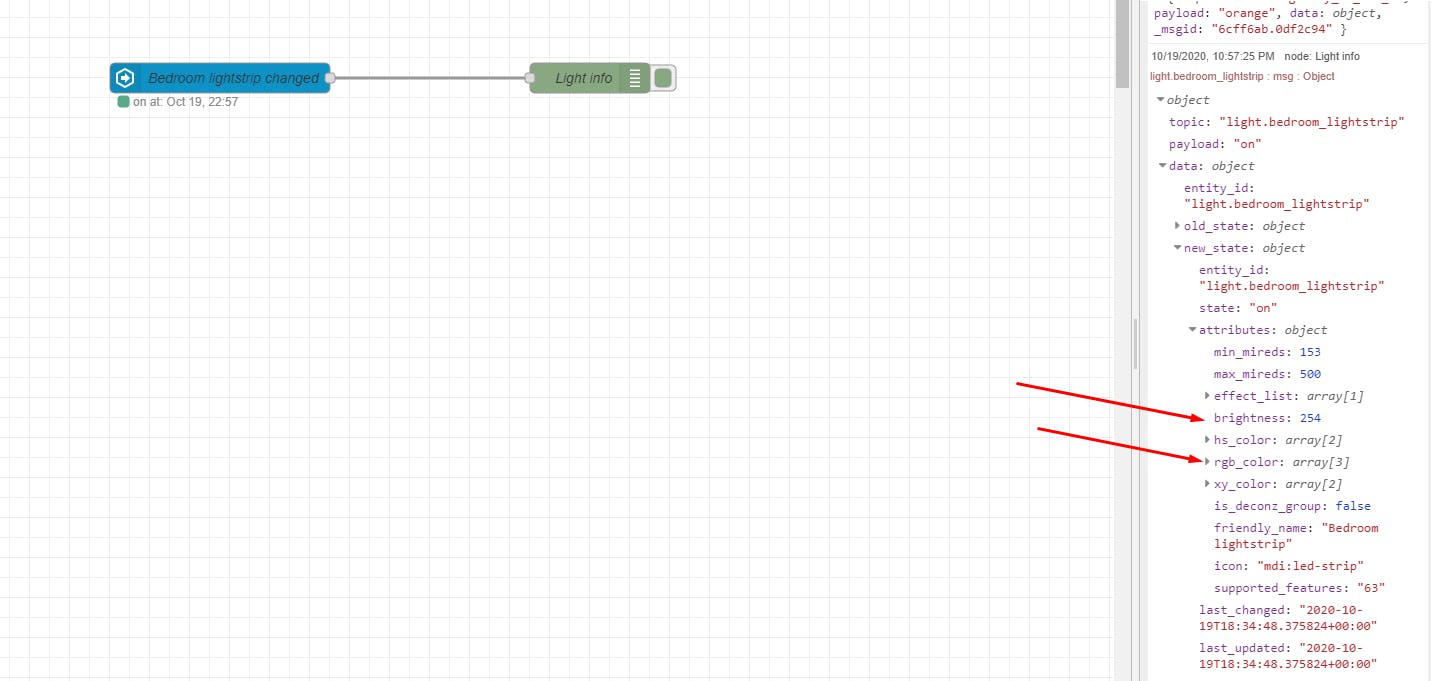
Let's say that I want to sync two lights, so whenever my bedroom light strip changes brightness or color, I want my office light strip to do the same. For this, we'll need the brightness and rgb_color attributes.
First, I'll use a debug node to see the path of the attributes. As you can see, if I want to use the "brightness" attribute then I must use the path "msg.data.new_state.attributes.brightness".
PS: If the images are too small to understand the text, right click over it and "Open the image in a new tab".

We then add a "call service" node that will use the value from the attributes above with JSONata:


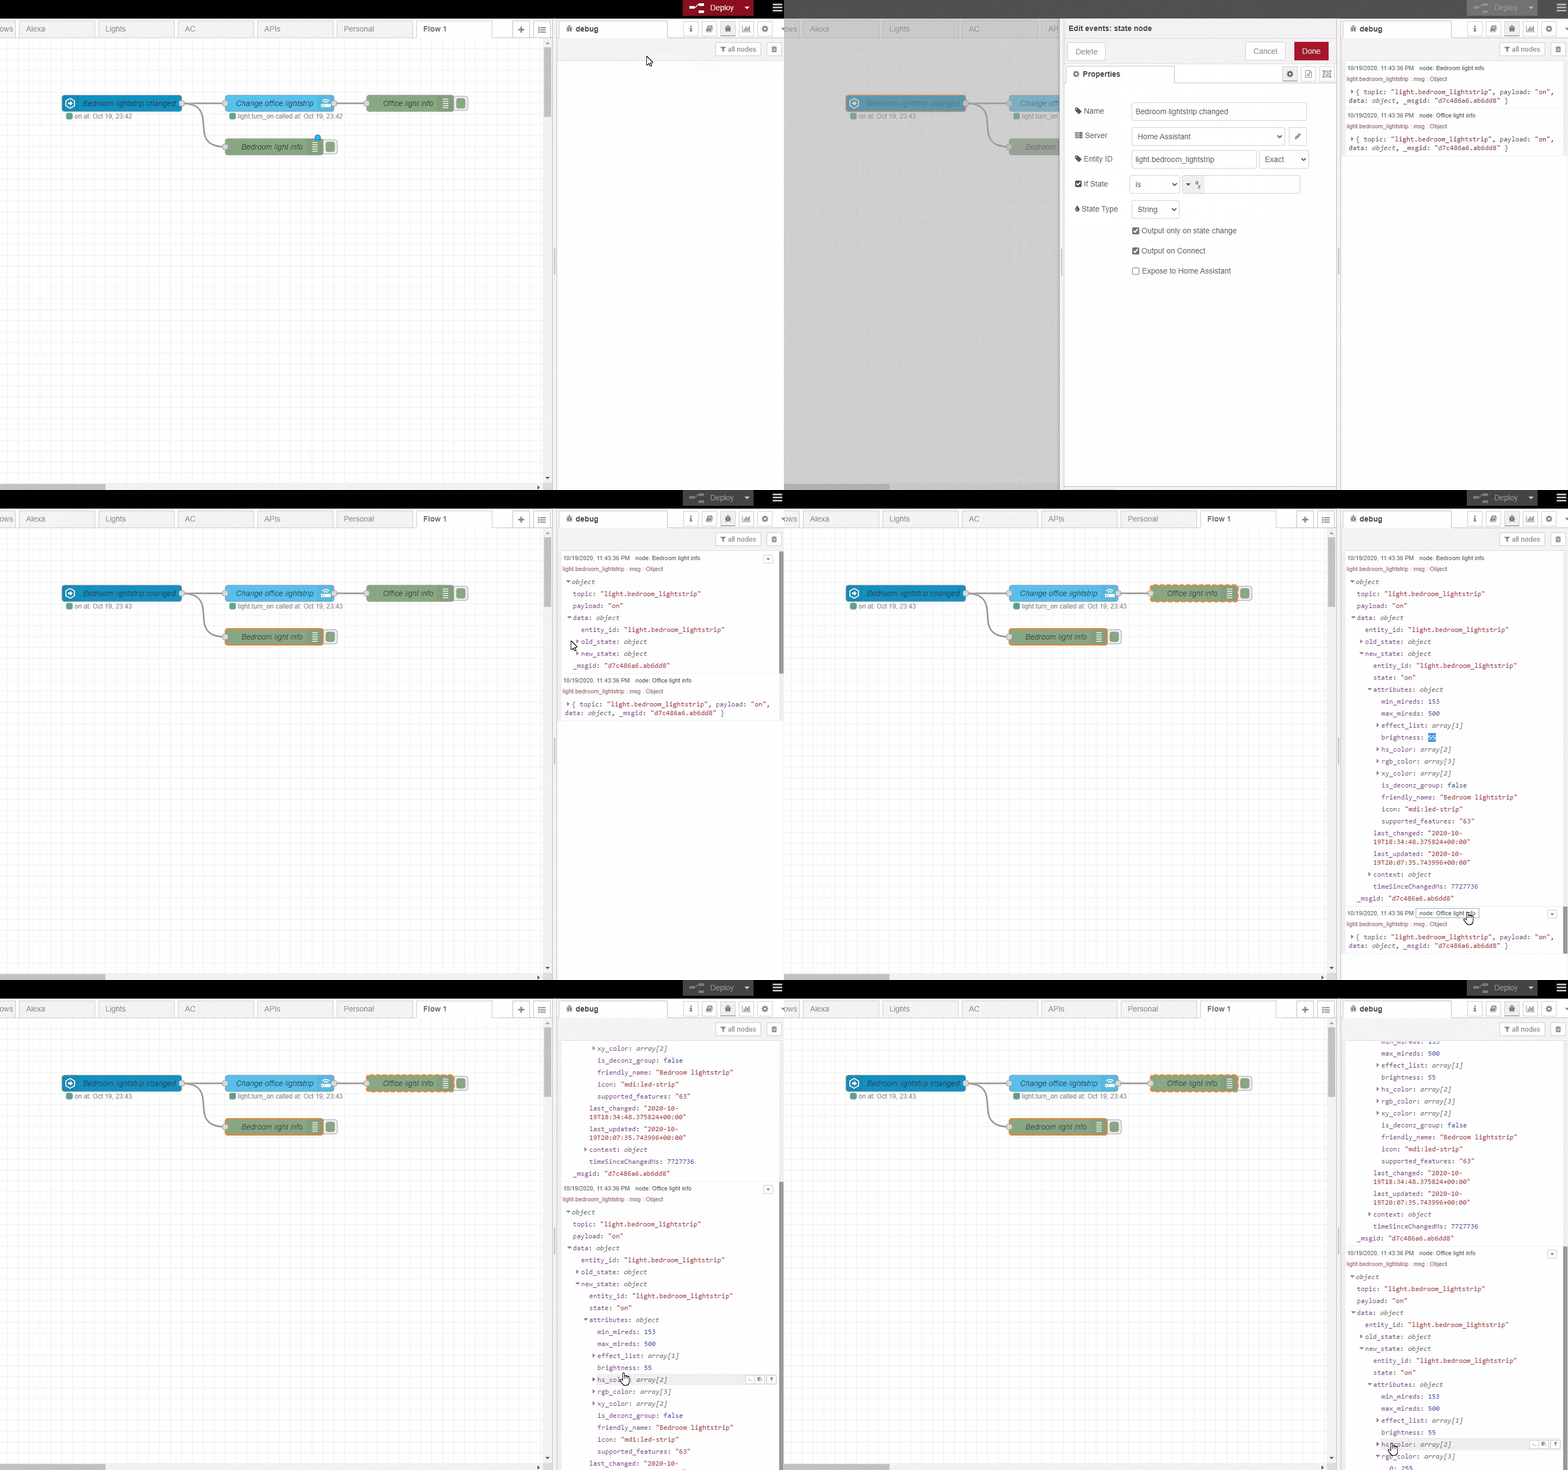
This is all you need. Now, whenever the state of my bedroom light strip changes, the office one will do the same.
I exported the flow as a JSON so you can easily import it and test it yourself. Just open the Node-Red menu from the top right, choose "Import" -> "Clipboard", and paste the following JSON:
You can also watch this GIF to see it in action:

In the next article I'll talk about using environment variables for sending data, so follow me on Twitter or subscribe to my newsfeed in order to be notified when it's up.
