I've been using IoTLink for a few weeks, mostly because I want to make some automations based on my laptop usage. I'm also a .NET developer, so when I saw that I can create my own addons, I immediately jumped into it by creating something that was missing for me, a CPU temperature sensor. I actually made a YouTube video showing the entire process which you can see below, but if you prefer an article then you also have the basic steps in here, or if you just want to install the addon then go to the bottom of the article and you can find the download link and another video with the installation instructions.
1. Clone the IOTLink repository
In order to create your own addon, you're going to need the IOTLinkAPI library. You can use it by just downloading and referencing the dll, or you can grab the entire IOTLink solution and reference the IOTLinkAPI project. I chose the second option because I wanted to explore their API as well, so in this way I could debug through the IOTLinkService and their other existing addons and commands.
2. Running the project
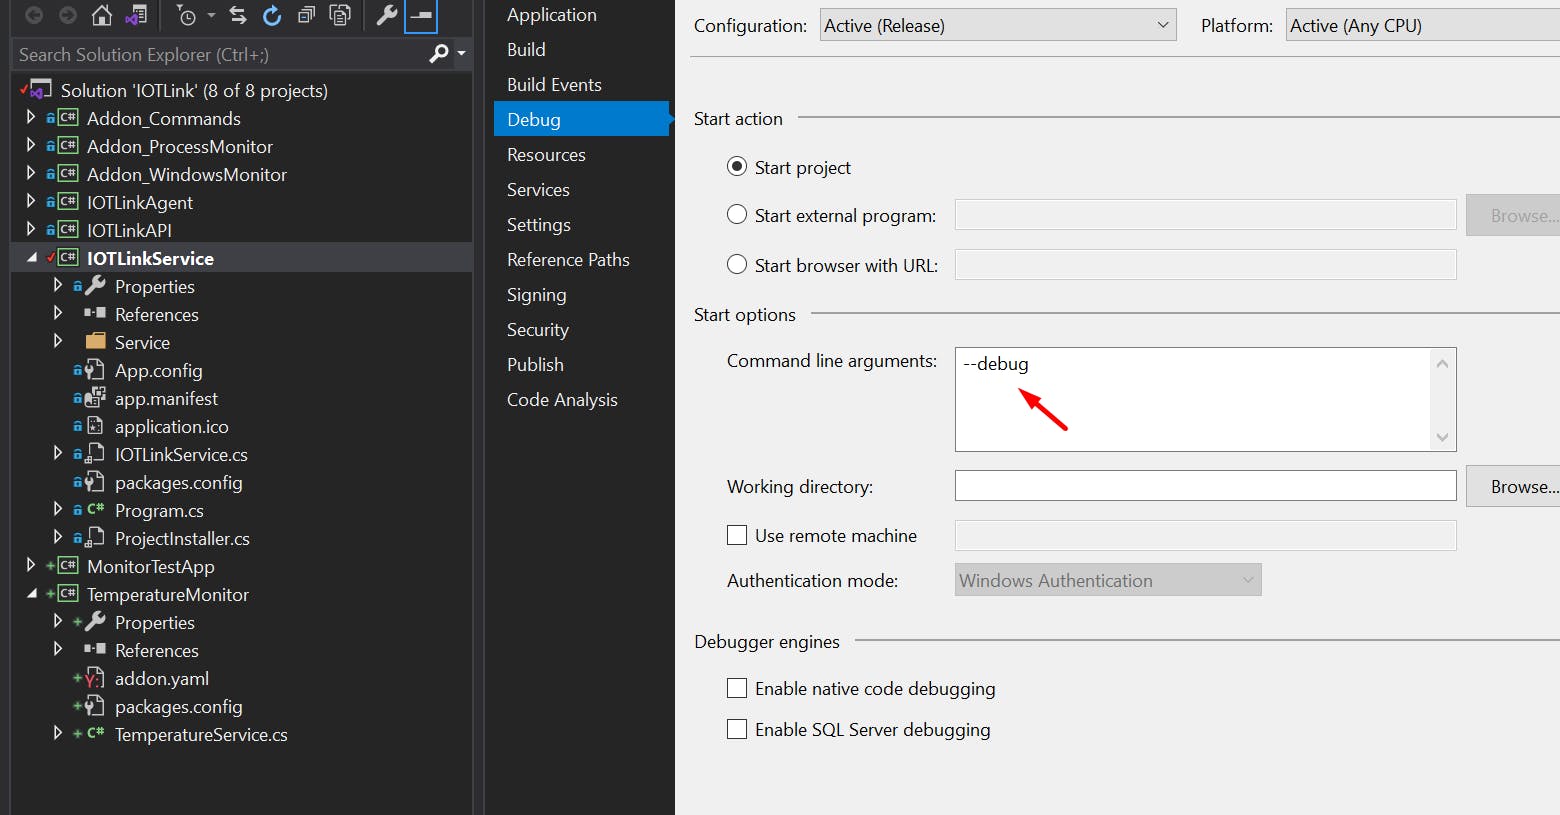
In order to debug the project, you first have to start Visual Studio as an administrator, and then select the IOTLinkService as the startup project. The next step is to go to the project properties -> Debug -> Command line arguments and type in there the "--debug" argument, like this.

I would first recommend you to stop the IOTLink service from Task Manager if it is already started. The Visual Studio project will use the same configuration.yaml file that is being used by the IOTLink installation (mine is located at C:\ProgramData\IOTLink\Configs\configuration.yaml). This means that if you run the project from Visual Studio, it will be able to connect to Home Assistant because the configuration is already there.
3. Creating the addon
Now you'll have to create a new project of type Class Library (.NET Framework). I recommend creating it inside the IOTLink solution, because as I said above you can reference the projects directly and it's easier to debug. Once you have the project created, go ahead and create a class called "TemperatureService", and make it inherit from ServiceAddon. To do this, you'll have to add a reference to the IOTLinkApi project.
In this TemperatureService class we'll have to do two things. a) Publish a discovery message for our sensor(s) b) Publish data regularly through MQTT
The discovery message should be published when the addon is loading, and to do this you'll have to override the Init() function. In order to send data regularly, I created a Timer that executes every 10 seconds. Here's how my Init function looks like:
public override void Init(IAddonManager addonManager)
{
    base.Init(addonManager);
    _temperatureTopic = "Stats/CPU/Temperature";
    GetManager().PublishDiscoveryMessage(this, _temperatureTopic, "CPU", new HassDiscoveryOptions
    {
        Id = "Temperature",
        Unit = "°C",
        Name = "Temperature",
        Component = HomeAssistantComponent.Sensor,
        Icon = "mdi:thermometer"
    });
    _monitorTimer = new Timer();
    _monitorTimer.Interval = 10000;
    _monitorTimer.Elapsed += TimerElapsed;
    _monitorTimer.Start();
}
In the TimerElapsed function I write my code for retrieving the CPU temperature and sending it to Home Assistant.
private void TimerElapsed(object sender, ElapsedEventArgs e)
        {
            try
            {
                var averageTemperature = GetTemperature();
                LoggerHelper.Info($"Sending {averageTemperature} celsius");
                GetManager().PublishMessage(this, _temperatureTopic, averageTemperature.ToString());
            }
            catch (Exception exception)
            {
                LoggerHelper.Error("Failed to send temperature " + exception);
            }
        }

        public static int GetTemperature()
        {
            Computer computer = new Computer
            {
                IsCpuEnabled = true
            };

            computer.Open();
            var cpu = computer.Hardware.FirstOrDefault(h => h.HardwareType == HardwareType.Cpu);
            var temperatureSensors = cpu.Sensors
                .Where(s => s.Name.StartsWith("CPU Core") && s.Name.ToLower().Contains("tjmax") == false && s.SensorType == SensorType.Temperature)
                .ToList();
            var averageTemperature = temperatureSensors.Average(t => t.Value.GetValueOrDefault());
            return (int)averageTemperature;
        }
The GetTemperature() function will return the CPU temperature with the help of an external library called LibreHardwareMonitorLib, and then I send that to Home Assistant using the PublishMessage function. There's one more thing you have to do before being able to send data. You have to register the addon in IOTLinkService.Service.EngineServiceAddonManager.LoadInternalAddons()
ServiceAddon[] internalAddons = new ServiceAddon[] { new TemperatureService() };
By adding a "new TemperatureService()" we're telling IOTLink to load our class as an internal addon. You'll have to add a reference from your project to IOTLinkService, otherwise it won't recognize the TemperatureService class. Once you do that, you can run the IOTLinkService project and you'll see that data gets pushed through MQTT. You can even use breakpoints in your addon to see what's going on in there.
4. Exporting your addon
If you want to share your addon with others, or run it in the existing IOTLink installation, then you'll have to copy the dll of your library to the Addons folder (for me that's C:\ProgramData\IOTLink\Addons). Here, you should create a new folder for your addon and in it you'll add the dll of you addon and an addon.yaml file. The addon.yaml file will tell IOTLink what's the name of your addon, what dll file it should load, and what are the minimum and maximum API requirements. Mine looks like this:
id: TemperatureMonitor
name: Temperature Monitor
file: TemperatureMonitor.dll
minApiVersion: 2.2.0
maxApiVersion:
If you now try to start the IOTLink service from Task Manager, you'll notice that it doesn't send data to Home Assistant. The reason is because you are using an external library and IOTLink doesn't know how to load it. In order to make things easier, I just installed the package Costura.Fody which bundles all my dependencies into only one dll. The only thing you have to do is to install the package and build your solution.
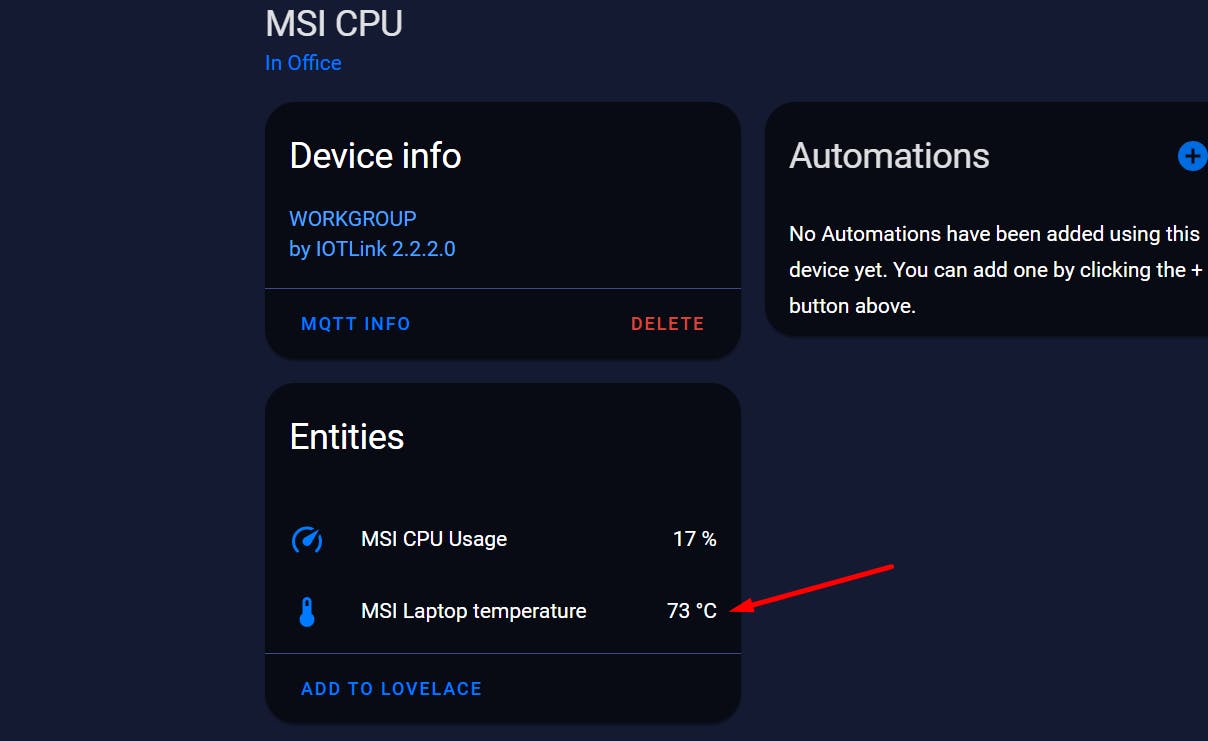
After doing this, the size of the TemperatureMonitor.dll jumped from 7kb to over 800kb, but in 2021 that's really not an issue. Now we can just take the new dll, put it in the addons folder that we created, and start IOTLink from the Task Manager services tab. Go ahead and open the CPU from your MQTT integration and you'll see that alongside CPU Load you also have the CPU Temperature.

The entire code is available on this repository and you can download the addon from the releases page . I even made a short video showing you how to install it! Any feedback is appreciated so don't shy away from commenting here or on the YouTube videos :)

