


Azure DevOps Series
Creating a multi-stage YAML pipeline in Azure DevOps for .NET projects
Running tests with code coverage in Azure DevOps YAML pipelines
Bicep Infrastructure Deployment from Azure DevOps YAML Pipelines
Azure DevOps Best Practices: Breaking Down the Monolithic YAML
I'm going to start a series about Azure DevOps and .NET applications. Of course, I'll need a test application so I'm going to write a helper for Todoist, my favorite task management software. In this first post, I'm just going to show you how to create a YAML pipeline that can build a .NET application and then deploy it to an Azure App Service. To keep this article short I will assume that you already have your .NET project created and that you also have an Azure subscription and an Azure DevOps account. If you want to watch a video where I show more details you can do this on my YouTube channel.
Creating a YAML pipeline
In Azure DevOps you have two ways of creating a pipeline, one is using YAML and the other one is using the UI editor. When I first started playing with pipelines I found it easier to do it with the UI editor, but YAML pipelines have some advantages that are more suitable for advanced scenarios. For example, YAML pipelines are 100% code-based, you can reuse snippets and you can validate changes using pull requests. Once you create a new pipeline you can decide if you're going to link your Git repo and use YAML, or you can use the classic editor.
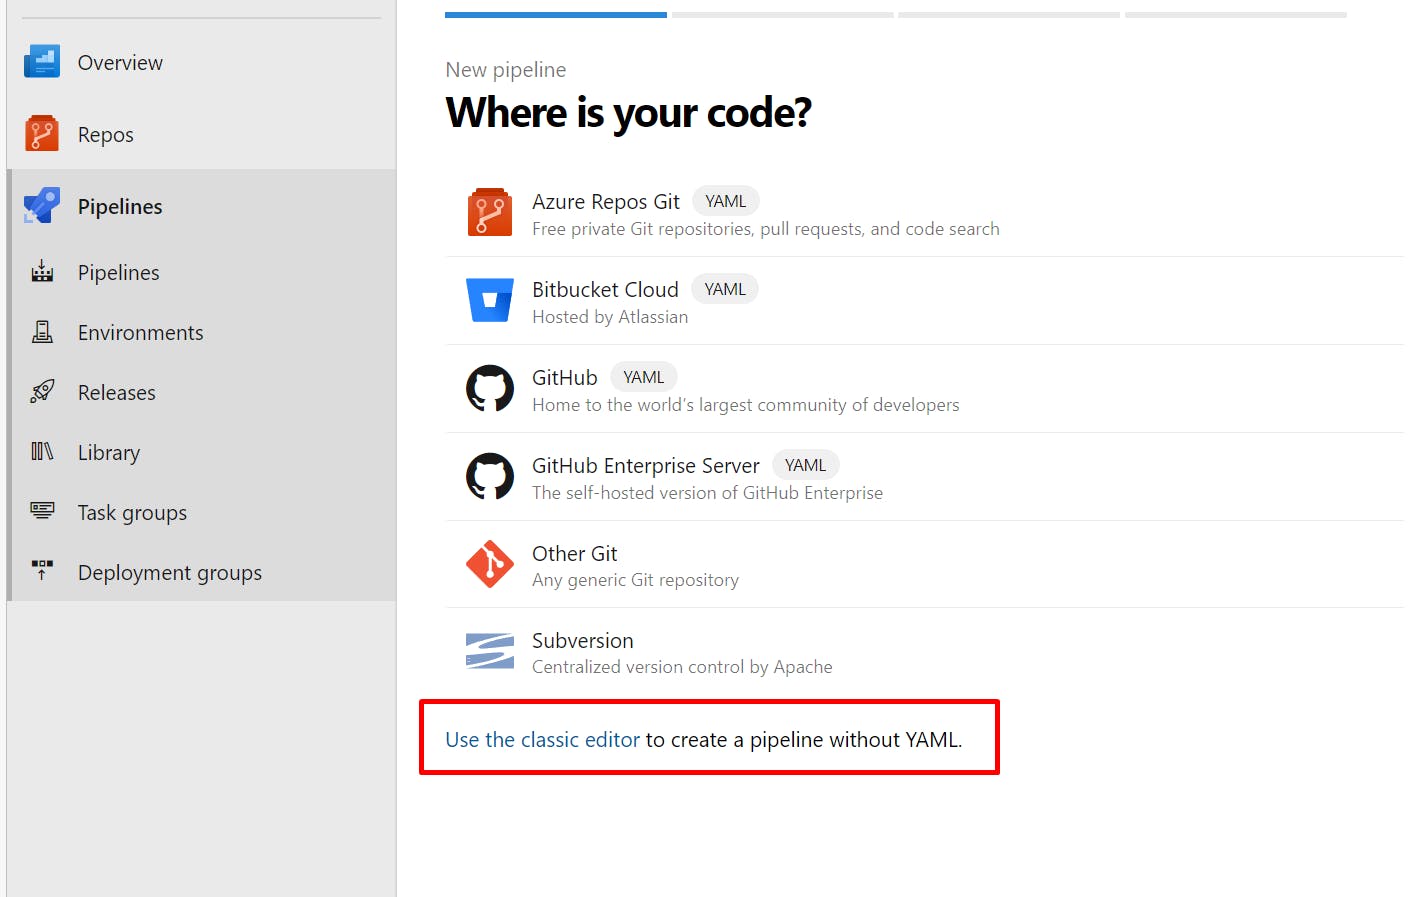
In my case, I used YAML pipelines so I picked the Azure Repos Git because that's where I have my code. Once I selected the repository and the "ASP .NET" pipeline I ended up on a page with a YAML file. Here's where we're going to make our changes.
I will add a snippet below which you can use to replace your YAML, and then I'm going to go through it line by line.
The first lines from the file configure the following:
trigger: I'm using this to say that I want to trigger the pipeline when I'm pushing commits to the main branch
pool: In my case, I selected 'ubuntu-latest' instead of Windows because it's faster and I'm using Linux for my app service as well. After that you will see the "stages" keyword. Our pipeline will have a collection of stages (build, test, deploy, etc), each stage will have a collection of jobs, and each job has a collection of steps. Those steps can be scripts or predefined tasks from Azure DevOps.
Creating the build stage
stages:
- stage: build
  jobs:
    - job: build
      steps:
      - script: dotnet build
        displayName: 'dotnet build'

      - script: dotnet publish -o $(build.artifactStagingDirectory)
        displayName: 'publish artifacts'

      - task: PublishPipelineArtifact@1
        inputs:
          targetPath: $(build.artifactStagingDirectory)
          artifact: 'drop'
          publishLocation: 'pipeline'
The build stage is pretty simple. We first define a stage with the name 'build', and inside we'll add a job with the name 'build'. This job will have 3 steps:
dotnet build
dotnet publish
Publish pipeline artifact
The first two are pretty simple. We use the dotnet SDK to build our app, and then we use the 'dotnet publish' command to publish the contents in a folder defined by the variable $(build.artifactStagingDirectory). Once the publish is completed we have to upload the contents of the folder to a location. In my case I named the location 'pipeline' and the artifact name is 'drop'. You can use whatever you want, I just got these as default so for simplicity I used the same names. You can now save and run your pipeline. Once the build is done you should see that the pipeline build has an artifact available, and inside the artifact are the contents of the publish folder. Next step is to deploy those files to an Azure app service.
Creating the deployment stage
After the build stage we're going to have a deployment stage. We're going to keep it simple and deploy directly after the build is succeeded, but you should know that you can add approvals here, or you can condition the deployment to be done only from certain branches.
- stage: deploy_app
jobs:
- job: deploy
steps:
- task: DownloadPipelineArtifact@2
inputs:
buildType: 'current'
artifactName: 'drop'
targetPath: '$(Pipeline.Workspace)/drop'
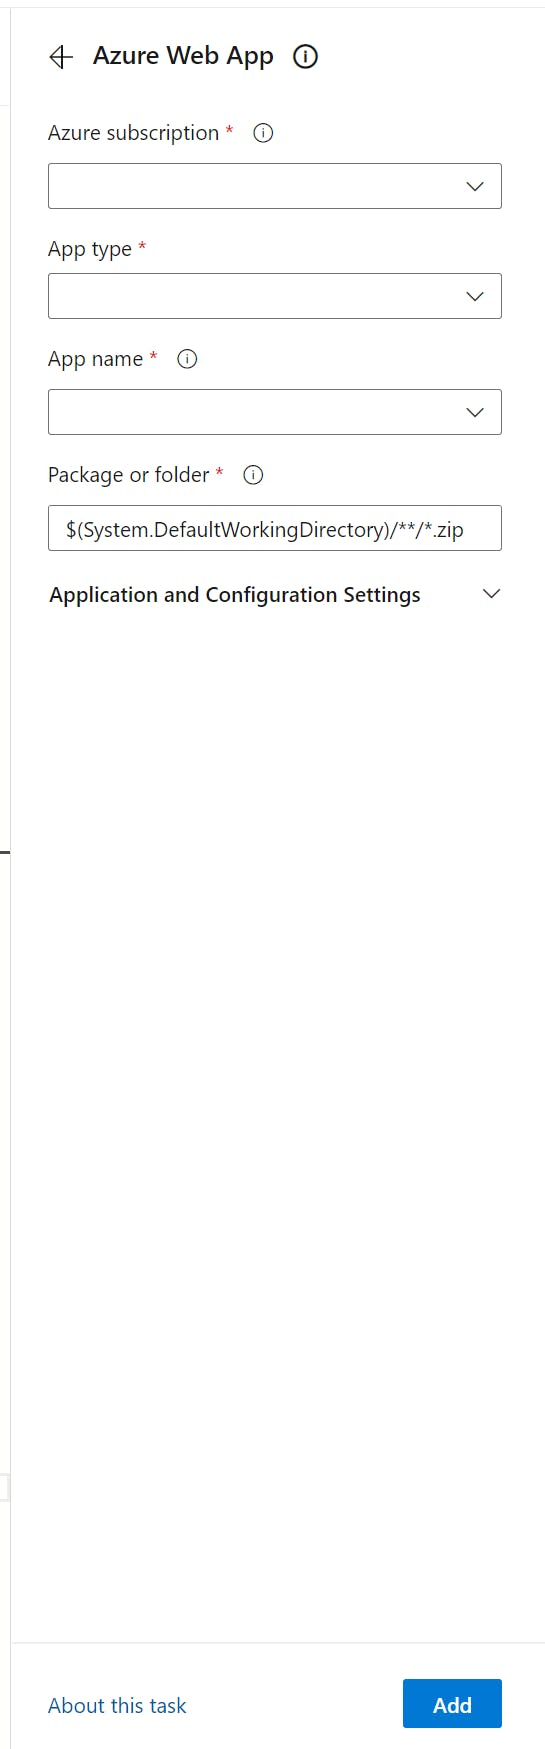
- task: AzureWebApp@1
inputs:
azureSubscription: 'Visual Studio Enterprise Subscription(97fbe79d-f21c-4cd0-b87f-8bd8df413e0a)'
appType: 'webAppLinux'
appName: 'TodoistApp'
package: '$(Pipeline.Workspace)/drop'
runtimeStack: 'DOTNETCORE|6.0'
The deployment stage has a job with two tasks. The first one will download the artifact we published earlier in the build stage, and the next task will deploy that artifact to our Azure app service. You can type these directly in YAML but there's also an editor that can help you define these settings. To use it you just have to find a task in the right side of the YAML editor and click on it. Once you fill the settings and click on "Add" the task will be added to your YAML file.
This should be enough for building and deploying a .NET application. In the next articles I will show you how to add a stage for unit tests and another one for static code analysis with NDepend.
The project along with the code and the pipeline can be found here: https://dev.azure.com/bujdea/TodoistApp
PS: If you would rather enjoy a video with all these steps you can watch it on my YouTube channel or play the embedded video here: